Store Temperature Forecasts
This tutorial will walk you through how to store ongoing temperature forecasts in San Francisco
Tutorial Overview
In this tutorial we will explain how to create and deploy a Network of Time Series (NoTS) that stores the 10-day temperature forecast for San Francisco every hour on an ongoing basis.
Create your NoTS
For this tutorial you will leverage the Enhanced Forecast API from The Weather Company. You will first create a source that is connected to this API and will then create a time series that receives its data from this source.
Web Application
Before you start, make sure that you have created a new Project. To create a new Project, navigate to the Project Index page and click on the plus icon in the top left corner.
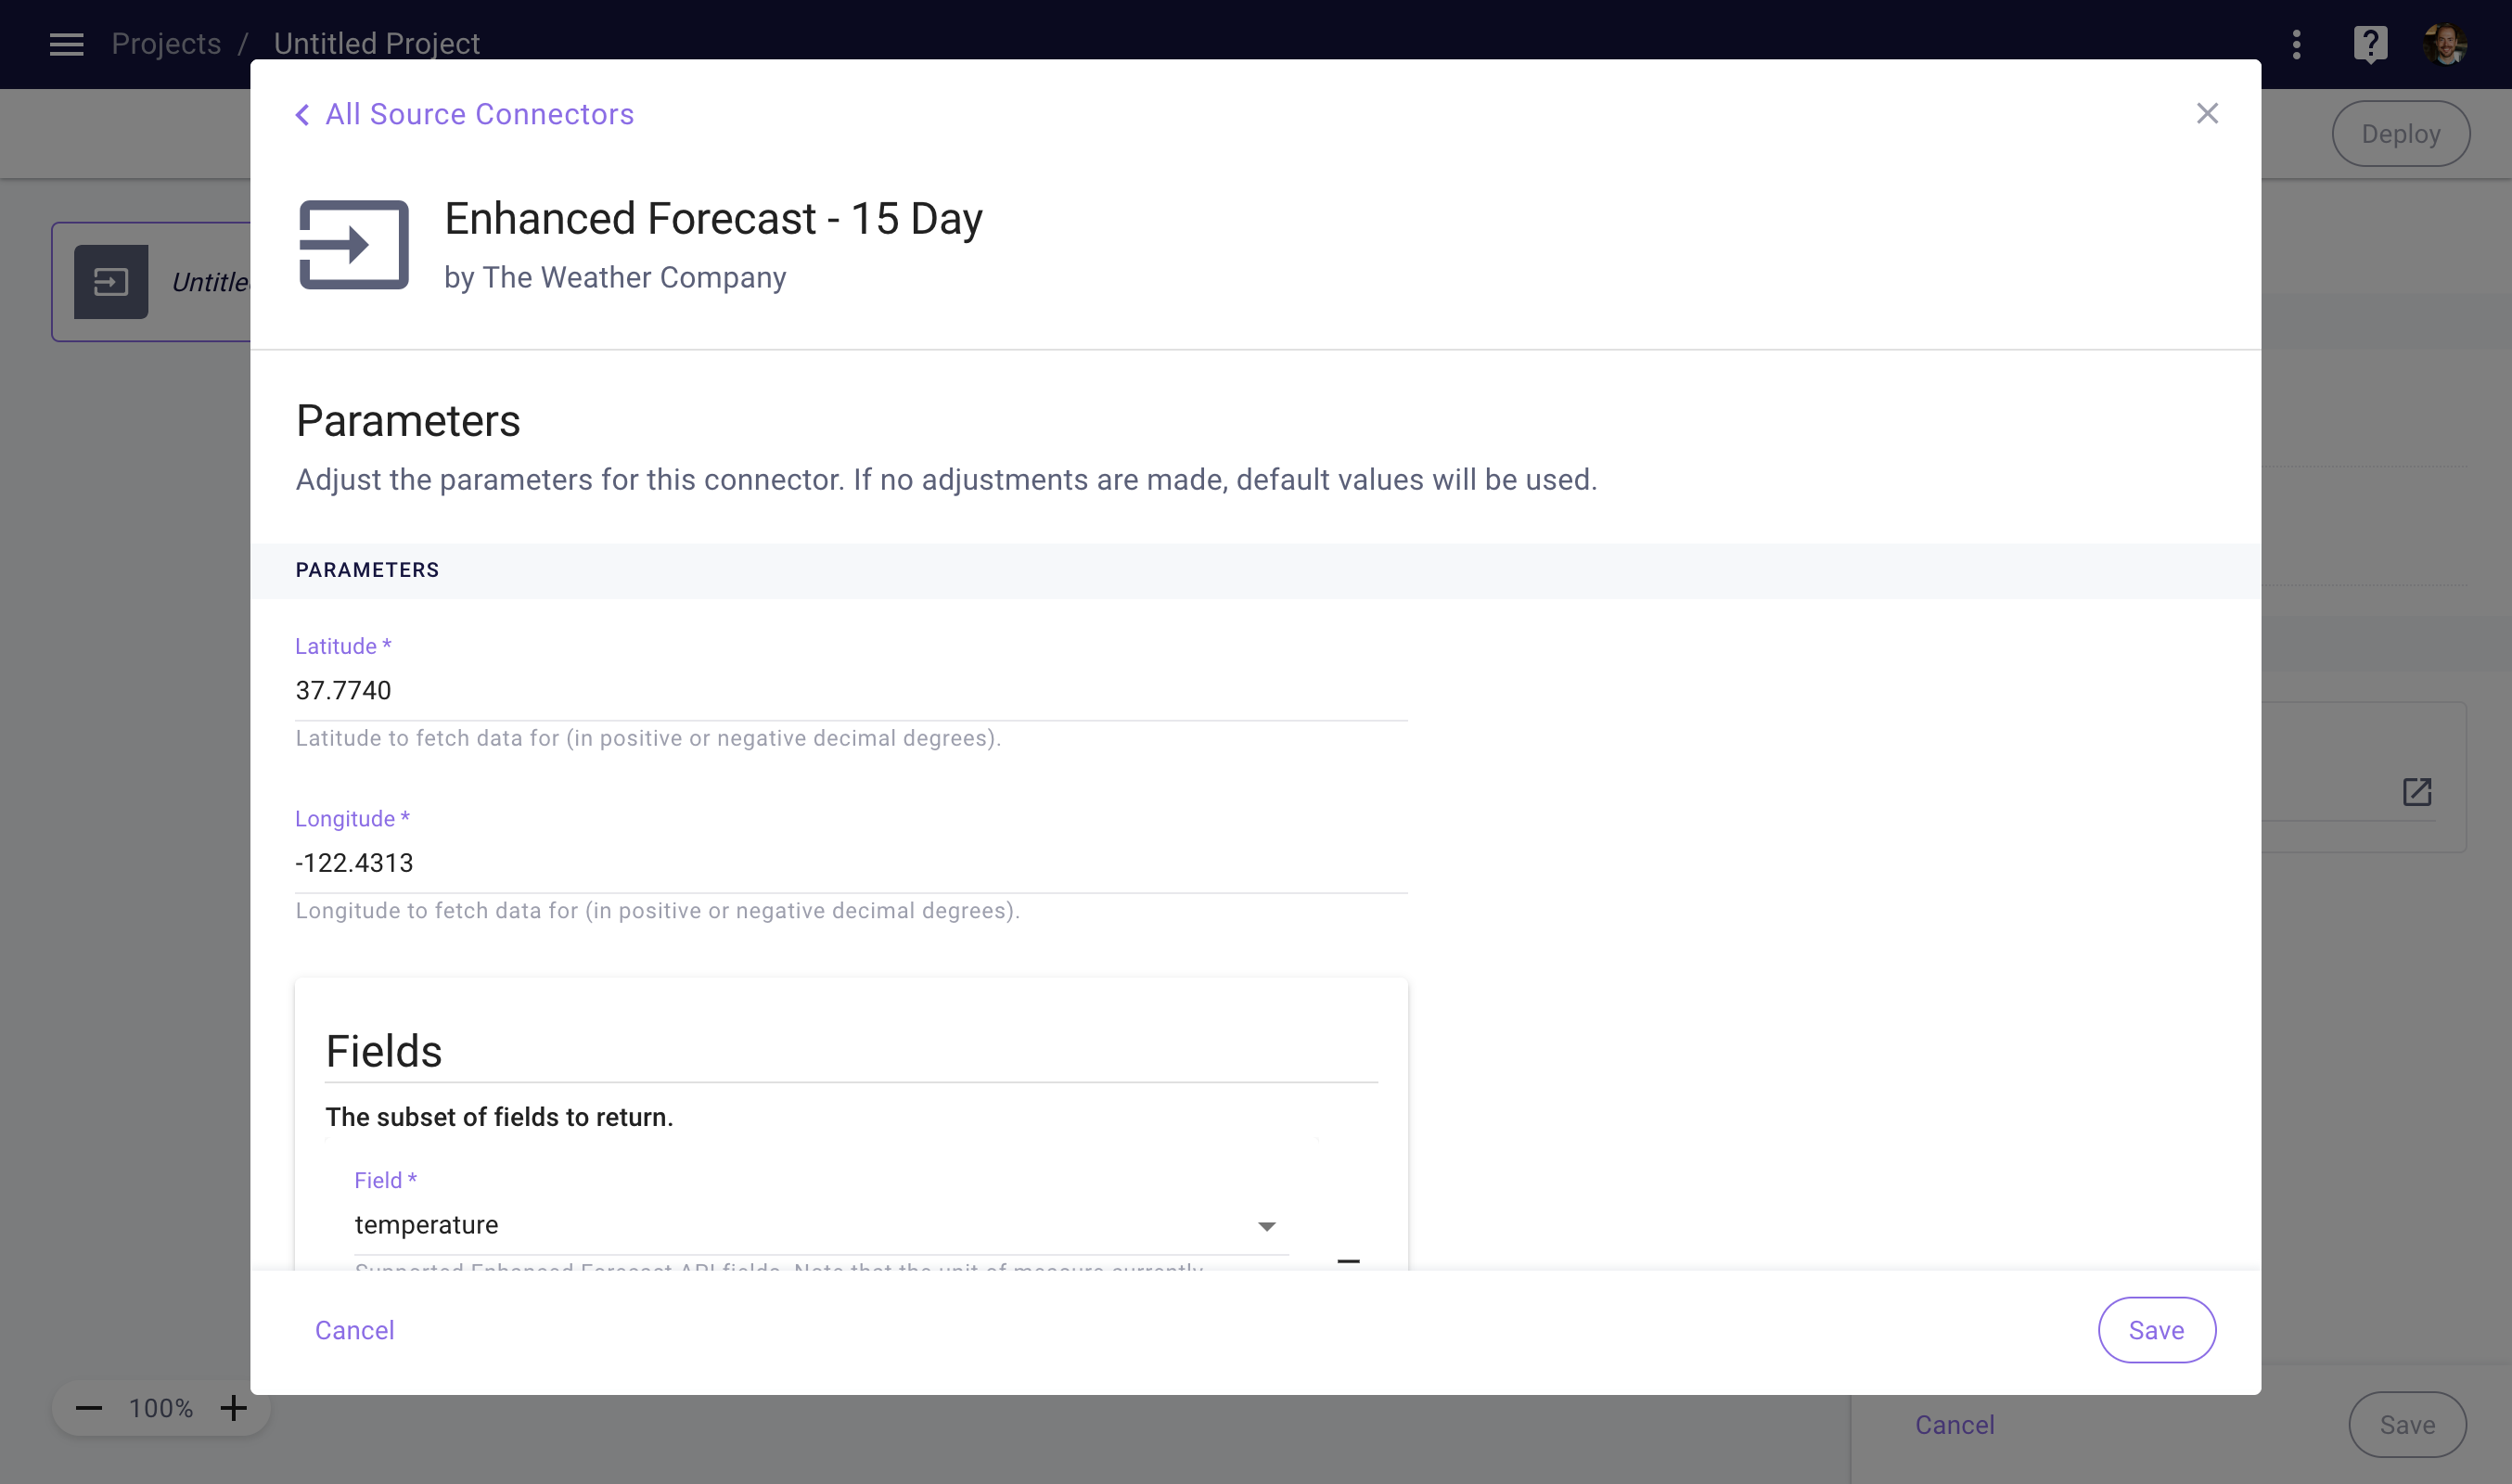
From the Project Create space, click the plus sign in the bottom right corner to create a new Source. To configure the Source, select the "Enhanced Forecast - 15 Day" connector from the Source Connector Library.

Configure your Source Connector
Use the following parameters to configure the Source Connector:
| Parameter | Value |
|---|---|
| Latitude | 37.7740 |
| Longitude | -122.4313 |
| Fields | temperature |
Now click save to confirm your changes. Once you've saved, you will be directed to the right side-panel, where you can enter a title for the new Source.
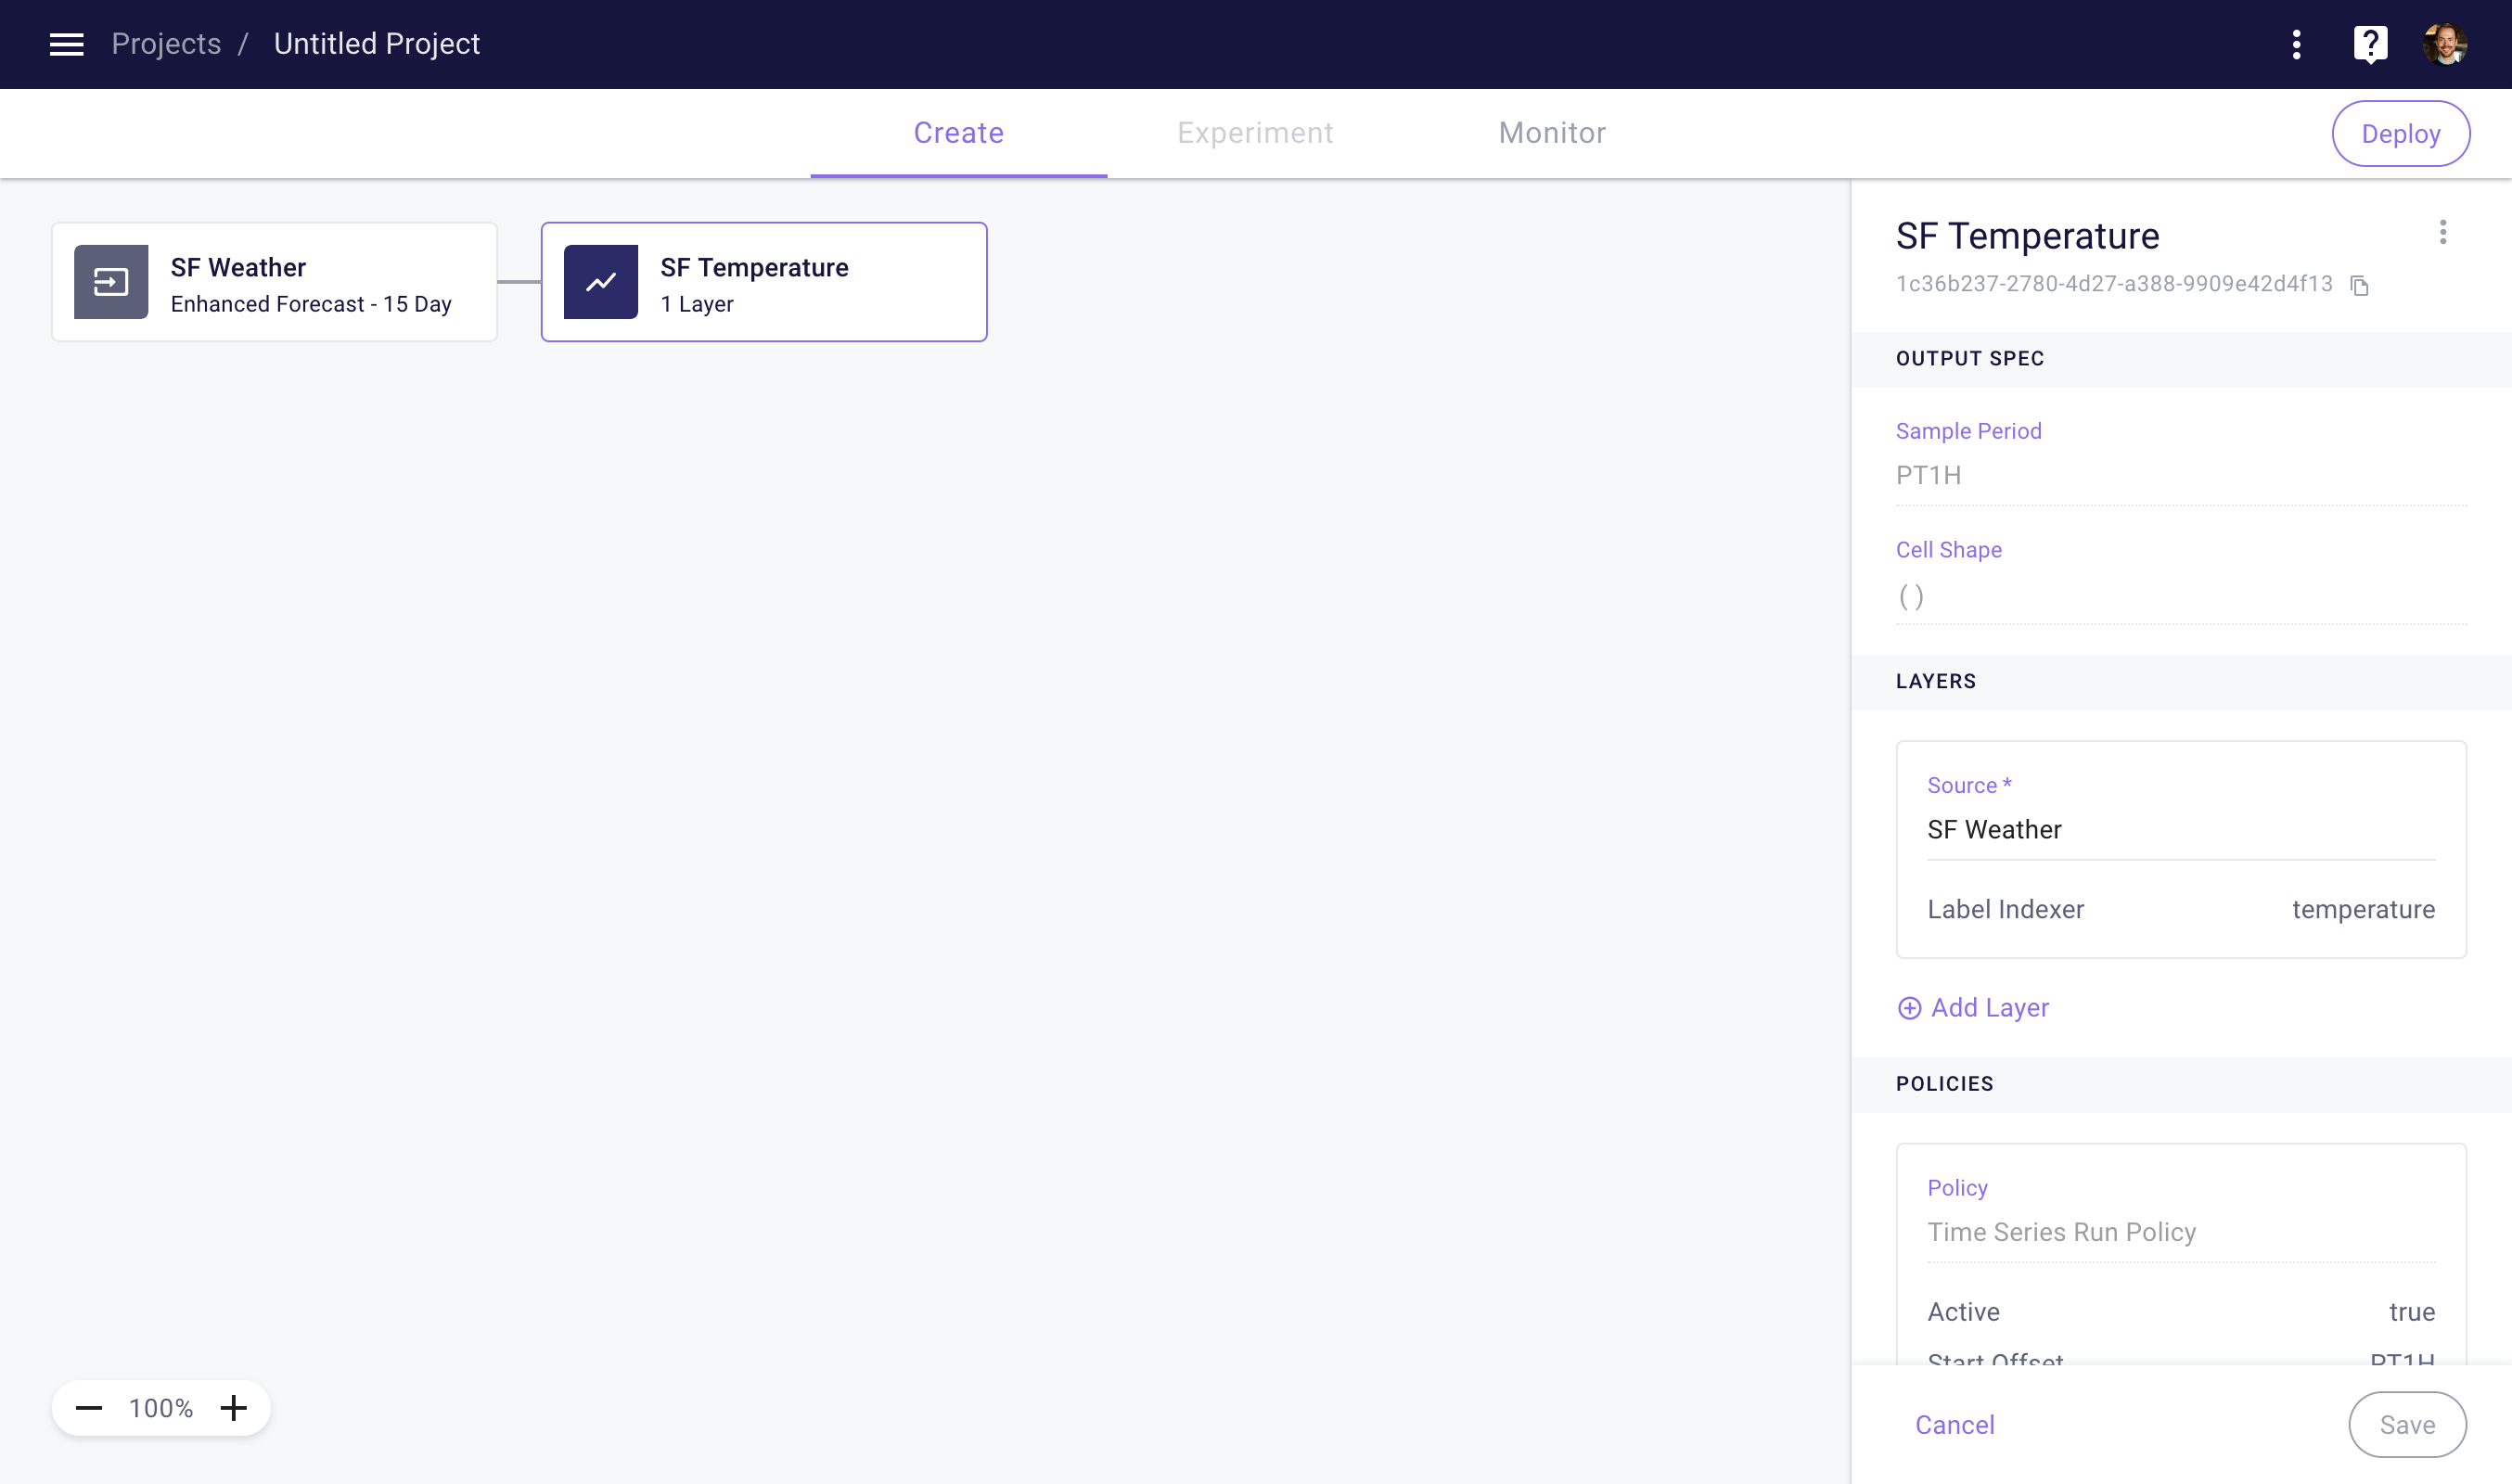
Next, click the plus sign in the bottom right corner again, but now to create a new Time Series. Click Add Layer in the right side-panel to open a new Layer card.

Configure your Time Series
Use the following configuration for your Layer:
| Field | Value |
|---|---|
| Node | [select your source] |
| Label Indexer | temperature |
| Start Timing | PT1H (optional) |
| End Timing | PT168H (optional) |
Since we will only add one Layer in this tutorial, you may leave the start timing and end timing unspecified. Now click the save button to persist your Layer.
Next, we will add a Time Series Run Policy that will ensure that we retrieve and store the 10-day temperature forecast every hour. Click "Add Policy" in the node side-panel to open a new policy card.
Use the following configuration for your policy:
| Field | Value |
|---|---|
| Start Timing | PT1H |
| End Timing | P10D |
| Schedule Timing | PT1H |
Now click the save button to persist your policy.
Client Library
To create the NoTS in the client library, you can use the following code.
import myst
from myst.connectors.source_connectors import enhanced_forecast

myst.authenticate()

# Create a new project.
project = myst.Project.create(title="My Project")

# Create a new source.
source = project.create_source(
    title="My Source",
    connector=enhanced_forecast.EnhancedForecast(
        latitude=37.7740,
        longitude=-122.4313,
        fields=[enhanced_forecast.Field.TEMPERATURE],
    ),
)

# Create a time series containing the temperature forecast.
time_series = source.create_time_series(
    title="SF Temperature",
    sample_period=myst.TimeDelta("PT1H"),
    label_indexer=enhanced_forecast.Field.TEMPERATURE,
)

# Add a run policy to the time series.
time_series.create_run_policy(
    start_timing=myst.TimeDelta("PT1H"),
    end_timing=myst.TimeDelta("P10D"),
    schedule_timing=myst.TimeDelta("PT1H"),
)
Deploy your NoTS
Once you've finished creating your NoTS, you can now go ahead and deploy your Project.
Web Application
To create a new Deployment, click the Deploy button in the top right corner of the Project Create page. Specify a title for your Deployment and then click the Deploy button.
Once you’ve deployed a project, your Time Series Run Policy will begin to run according to its schedule. This means that your Time Series will be run every hour for a time range from 1 hour to 10 days into the future. Note that this Policy will run indefinitely, until you deactivate your Deployment.

View the results of your deployment
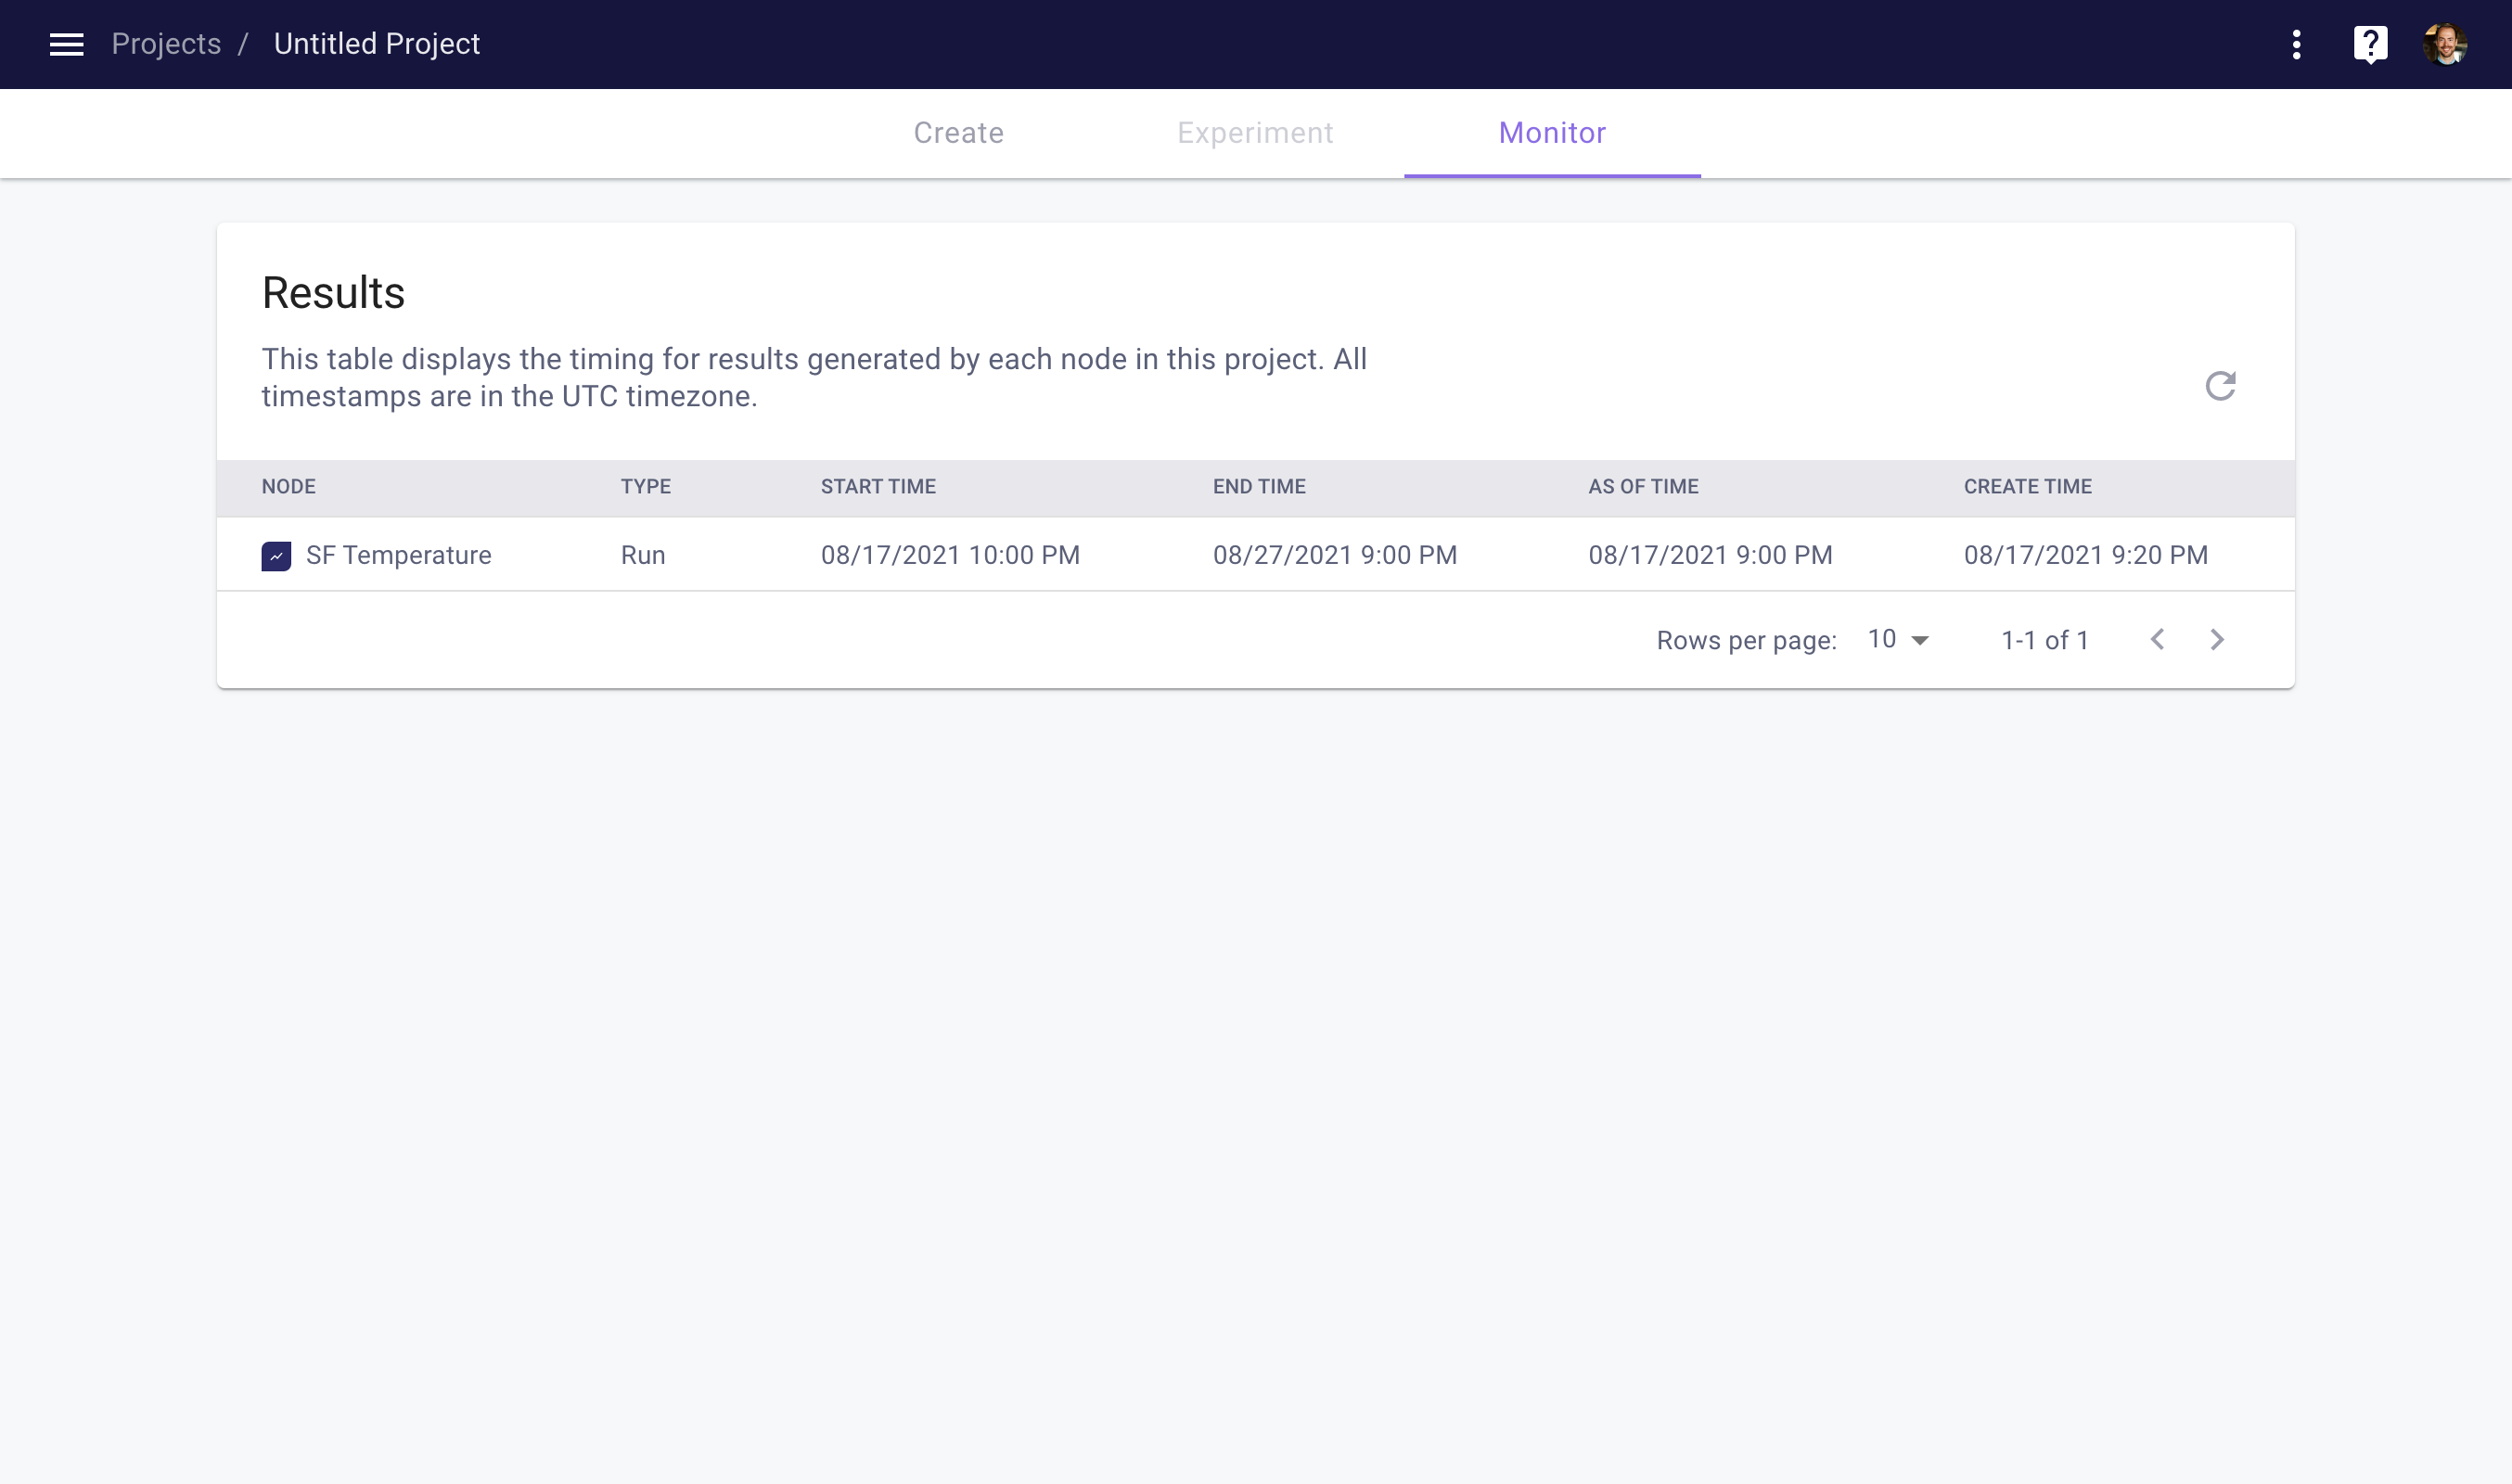
To track and verify the results of your Deployment, navigate to the Project Monitor space by clicking on the Monitor tab at the top of the Project page. The results table shows a list of ongoing results that are being generated by your policy. You can refresh the table by clicking on the refresh icon.
Client Library
The code below will deploy your project, creating a first model fit and time series run immediately.
# Deploy the project.
project.deploy("My Deployment")

# Create ad hoc time series node run job.
time_series_run_job = forecast_time_series.run(
    start_timing=myst.TimeDelta("PT1H"),
    end_timing=myst.TimeDelta("PT10D"),
)
Tutorial Complete
You are now storing the 10-day temperature forecasts for San Francisco on an ongoing basis. See the section on Query Time Series Data to learn more about how to query your stored forecasts.
Updated over 3 years ago