Create a Network of Time Series
This topic explains how to create and edit Projects using the Myst Platform
Create a Project
Networks of Time Series (NoTS) are at the core of the Myst Platform. They allow users to configure Time Series in a directed acyclic graph, which can be executed asynchronously based on a set of Policies to generate results. Time series data in a NoTS will flow from left to right through a set of Sources, Operations, and Models. The resulting data in each Time Series is stored in a scalable time series database, which can be queried flexibly by the user.
To begin creating a NoTS, first log in to the Myst Platform and create a new Project.
Web Application
To create a new Project, navigate to the Project Index page and click on the plus icon in the top left corner.
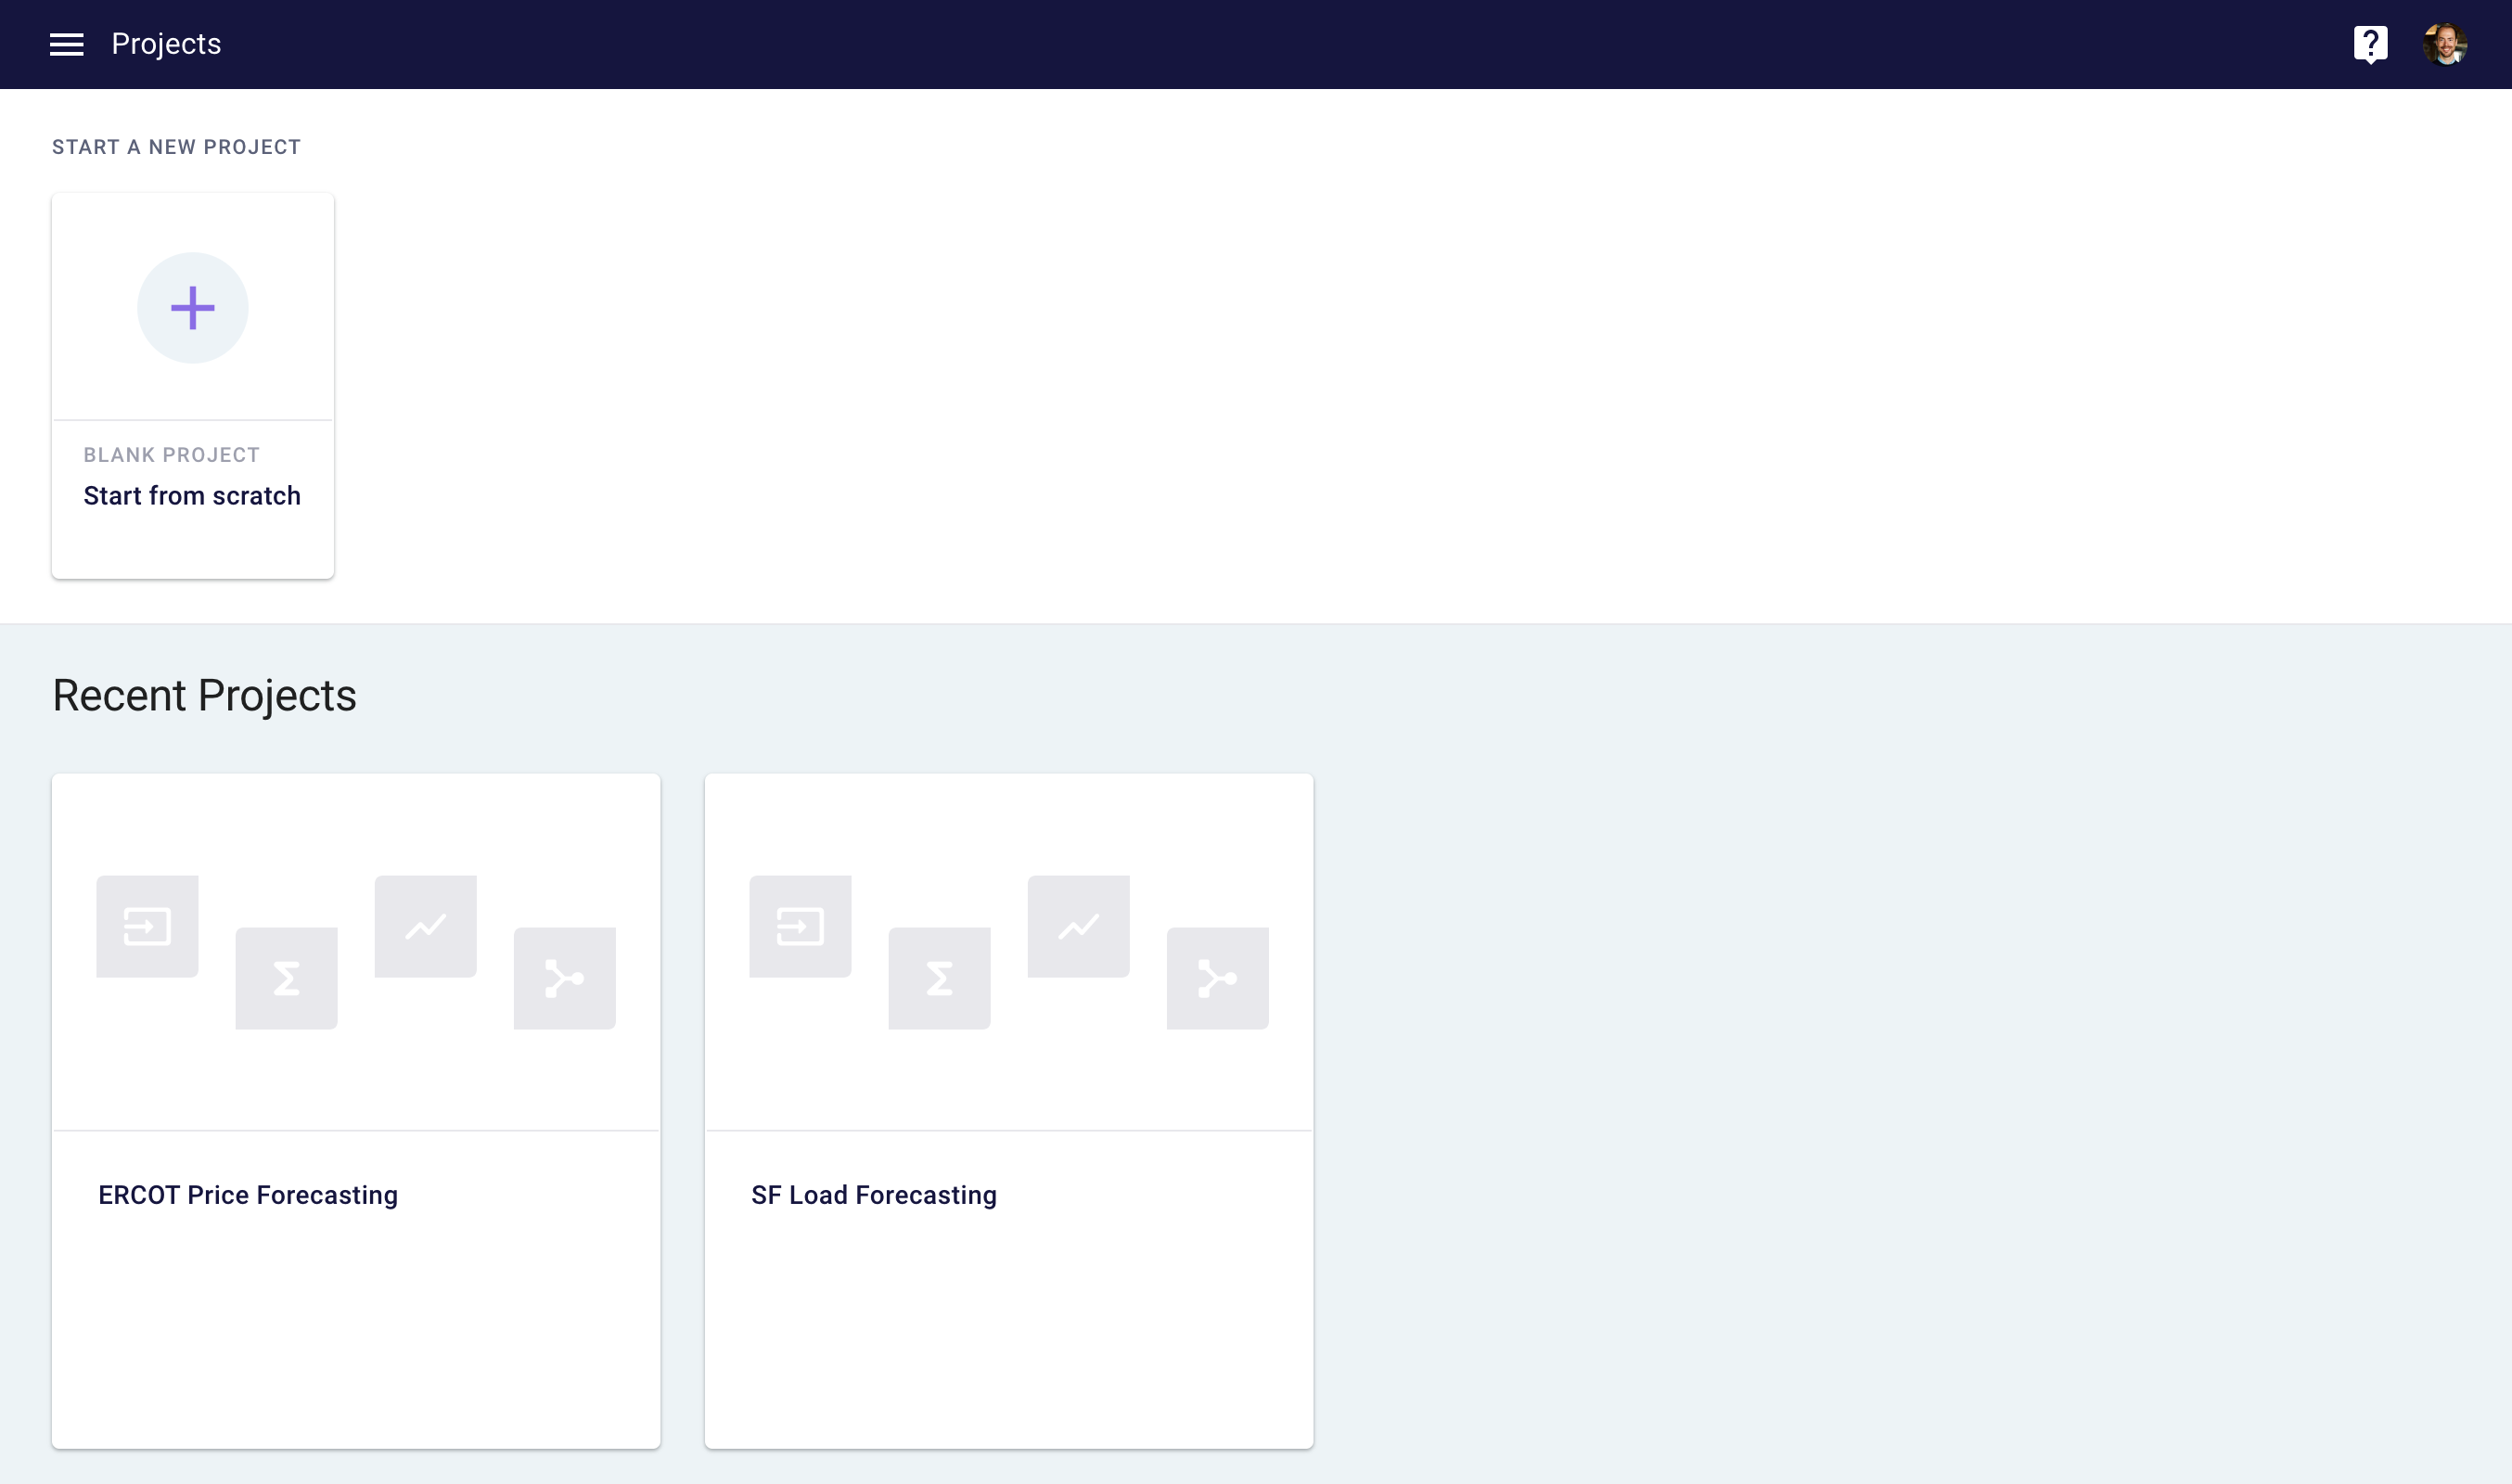
Projects Index page
Client Library
To create a new Project in the client library, you can use the following code.
import myst

myst.authenticate()

# Create a new project.
project = myst.Project.create(title="My Project")
You can create a project that is shared across your organization in the Myst Platform with the following code.
import myst
from myst.models.enums import OrgSharingRole

myst.authenticate()

# Create a new project that is shared.
project = myst.Project.create(
    title="My Shared Project",
    organization_sharing_enabled=True,
    organization_sharing_role=OrgSharingRole.EDITOR,
)
Create a Time Series
Time Series play a central role in the Myst Platform. Upon creation, a Time Series is an empty canvas, meaning that it does not contain any data. You can add one or more Layers to a Time Series, which can contain other Time Series, Sources, Operations, or Models. This allows you to stitch together output data from one or more Nodes. Data in a Time Series is stored in the time series database whenever a Time Series is run. You can determine a schedule for when a Time Series should run by creating a Time Series Run Policy.
Once you've created a Project, you can create a Time Series in your NoTS.
Web Application
From the Project Create space, click the plus sign in the bottom right corner and then click on Time Series. This action will create a new Time Series, which you can then configure.
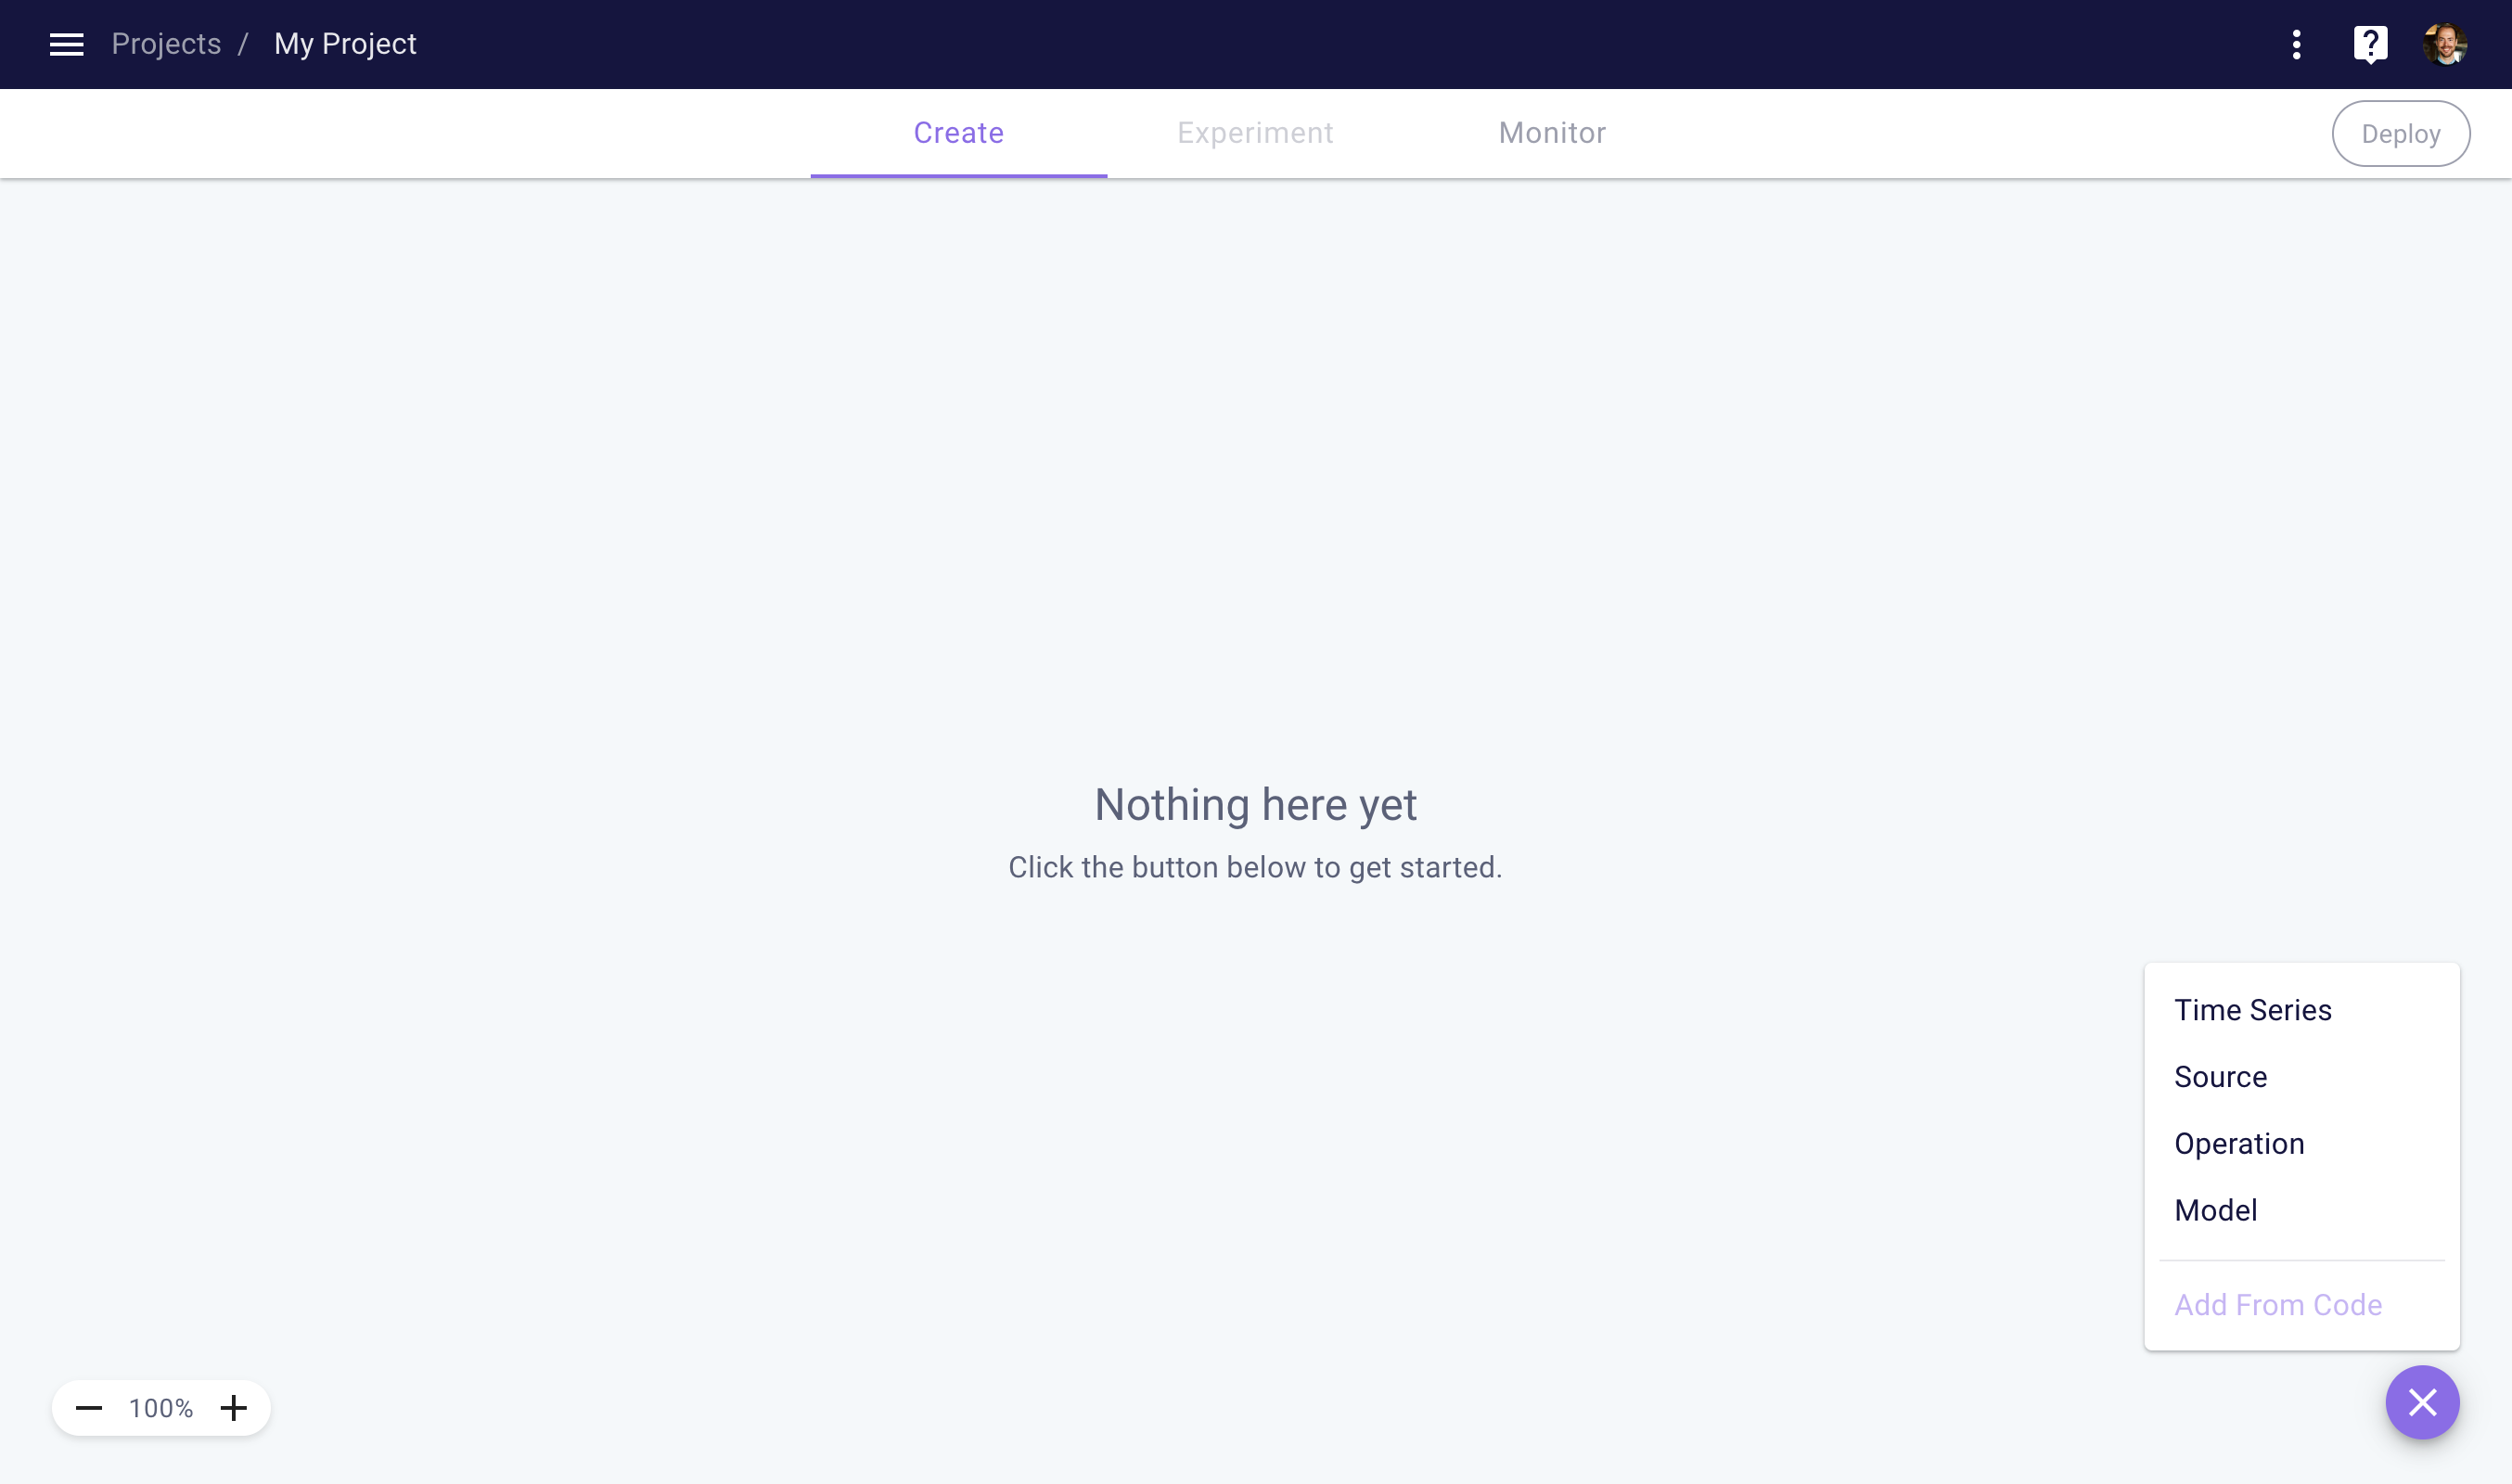
Add a new Node to your NoTS
To modify an existing Node (e.g. Time Series), you can click on any Node in your NoTS. Navigate your NoTS using the mouse-wheel button or your trackpad, leveraging panning and zooming.
To configure your Time Series, use the right side-panel. You can modify the Sample Period and add one or more Layers and Policies by clicking the Add Layer and Add Policy buttons, respectively.
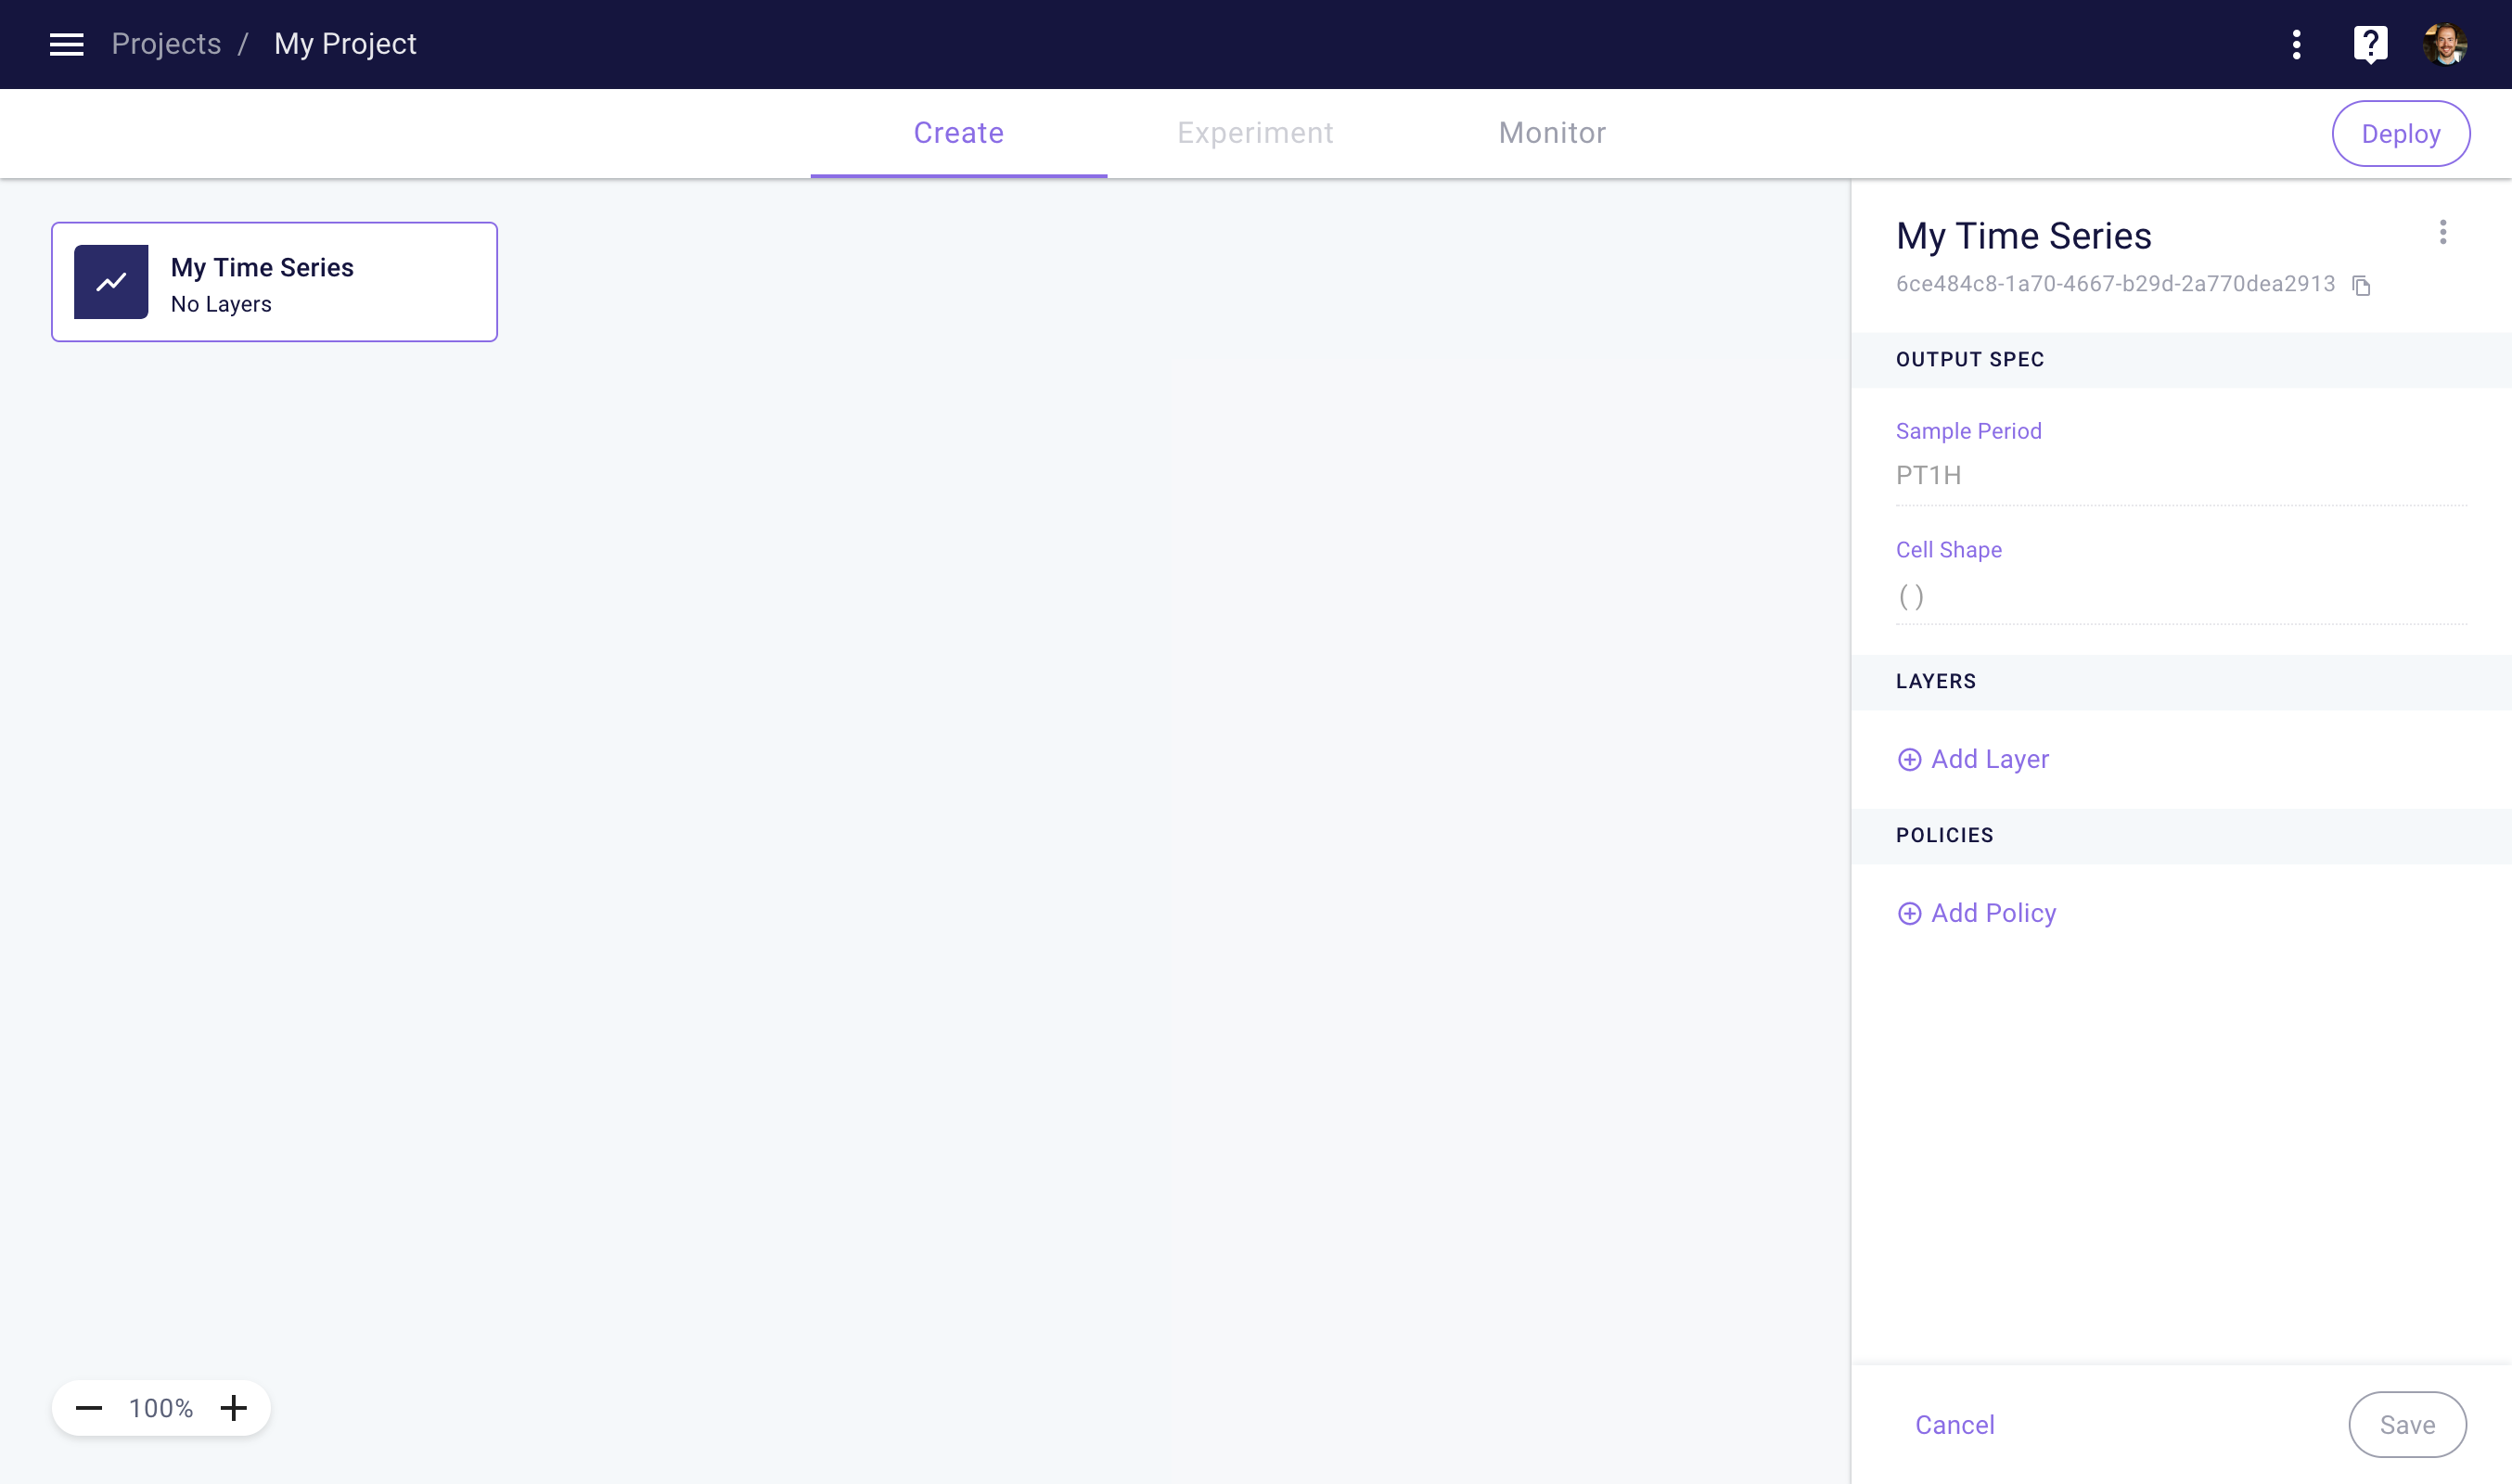
Configure a Time Series in your NoTS
Client Library
To create and configure a Time Series in the client library, you can use the following code.
import myst

myst.authenticate()

# Retrieve the project you want to use.
project = myst.Project.get(uuid="<uuid>")

# Create a new time series.
time_series = project.create_time_series(
    title="My Time Series",
    sample_period=myst.TimeDelta("PT1H"),
)

# Add a layer to the time series.
layer = time_series.create_layer(...)

# Add a run policy to the time series.
run_policy = time_series.create_run_policy(...)
Create a Source
Sources allow you to fetch time series data from a variety of internal and external sources. When initializing a Source you will need to specify a Source Connector, which contains the specific logic to fetch the time series data. Note that unlike the other Nodes, Sources cannot have any Nodes upstream from them.
Once you've created a Project, you can create a Source in your NoTS.
Web Application
From the Project Create space, click the plus sign in the bottom right corner and then click on Source. This action will create a new Source, which you can then configure.
To configure a Source, first select a connector from the Source Connector Library. Once you've selected a Source Connector, fill in the required parameters and then click save.
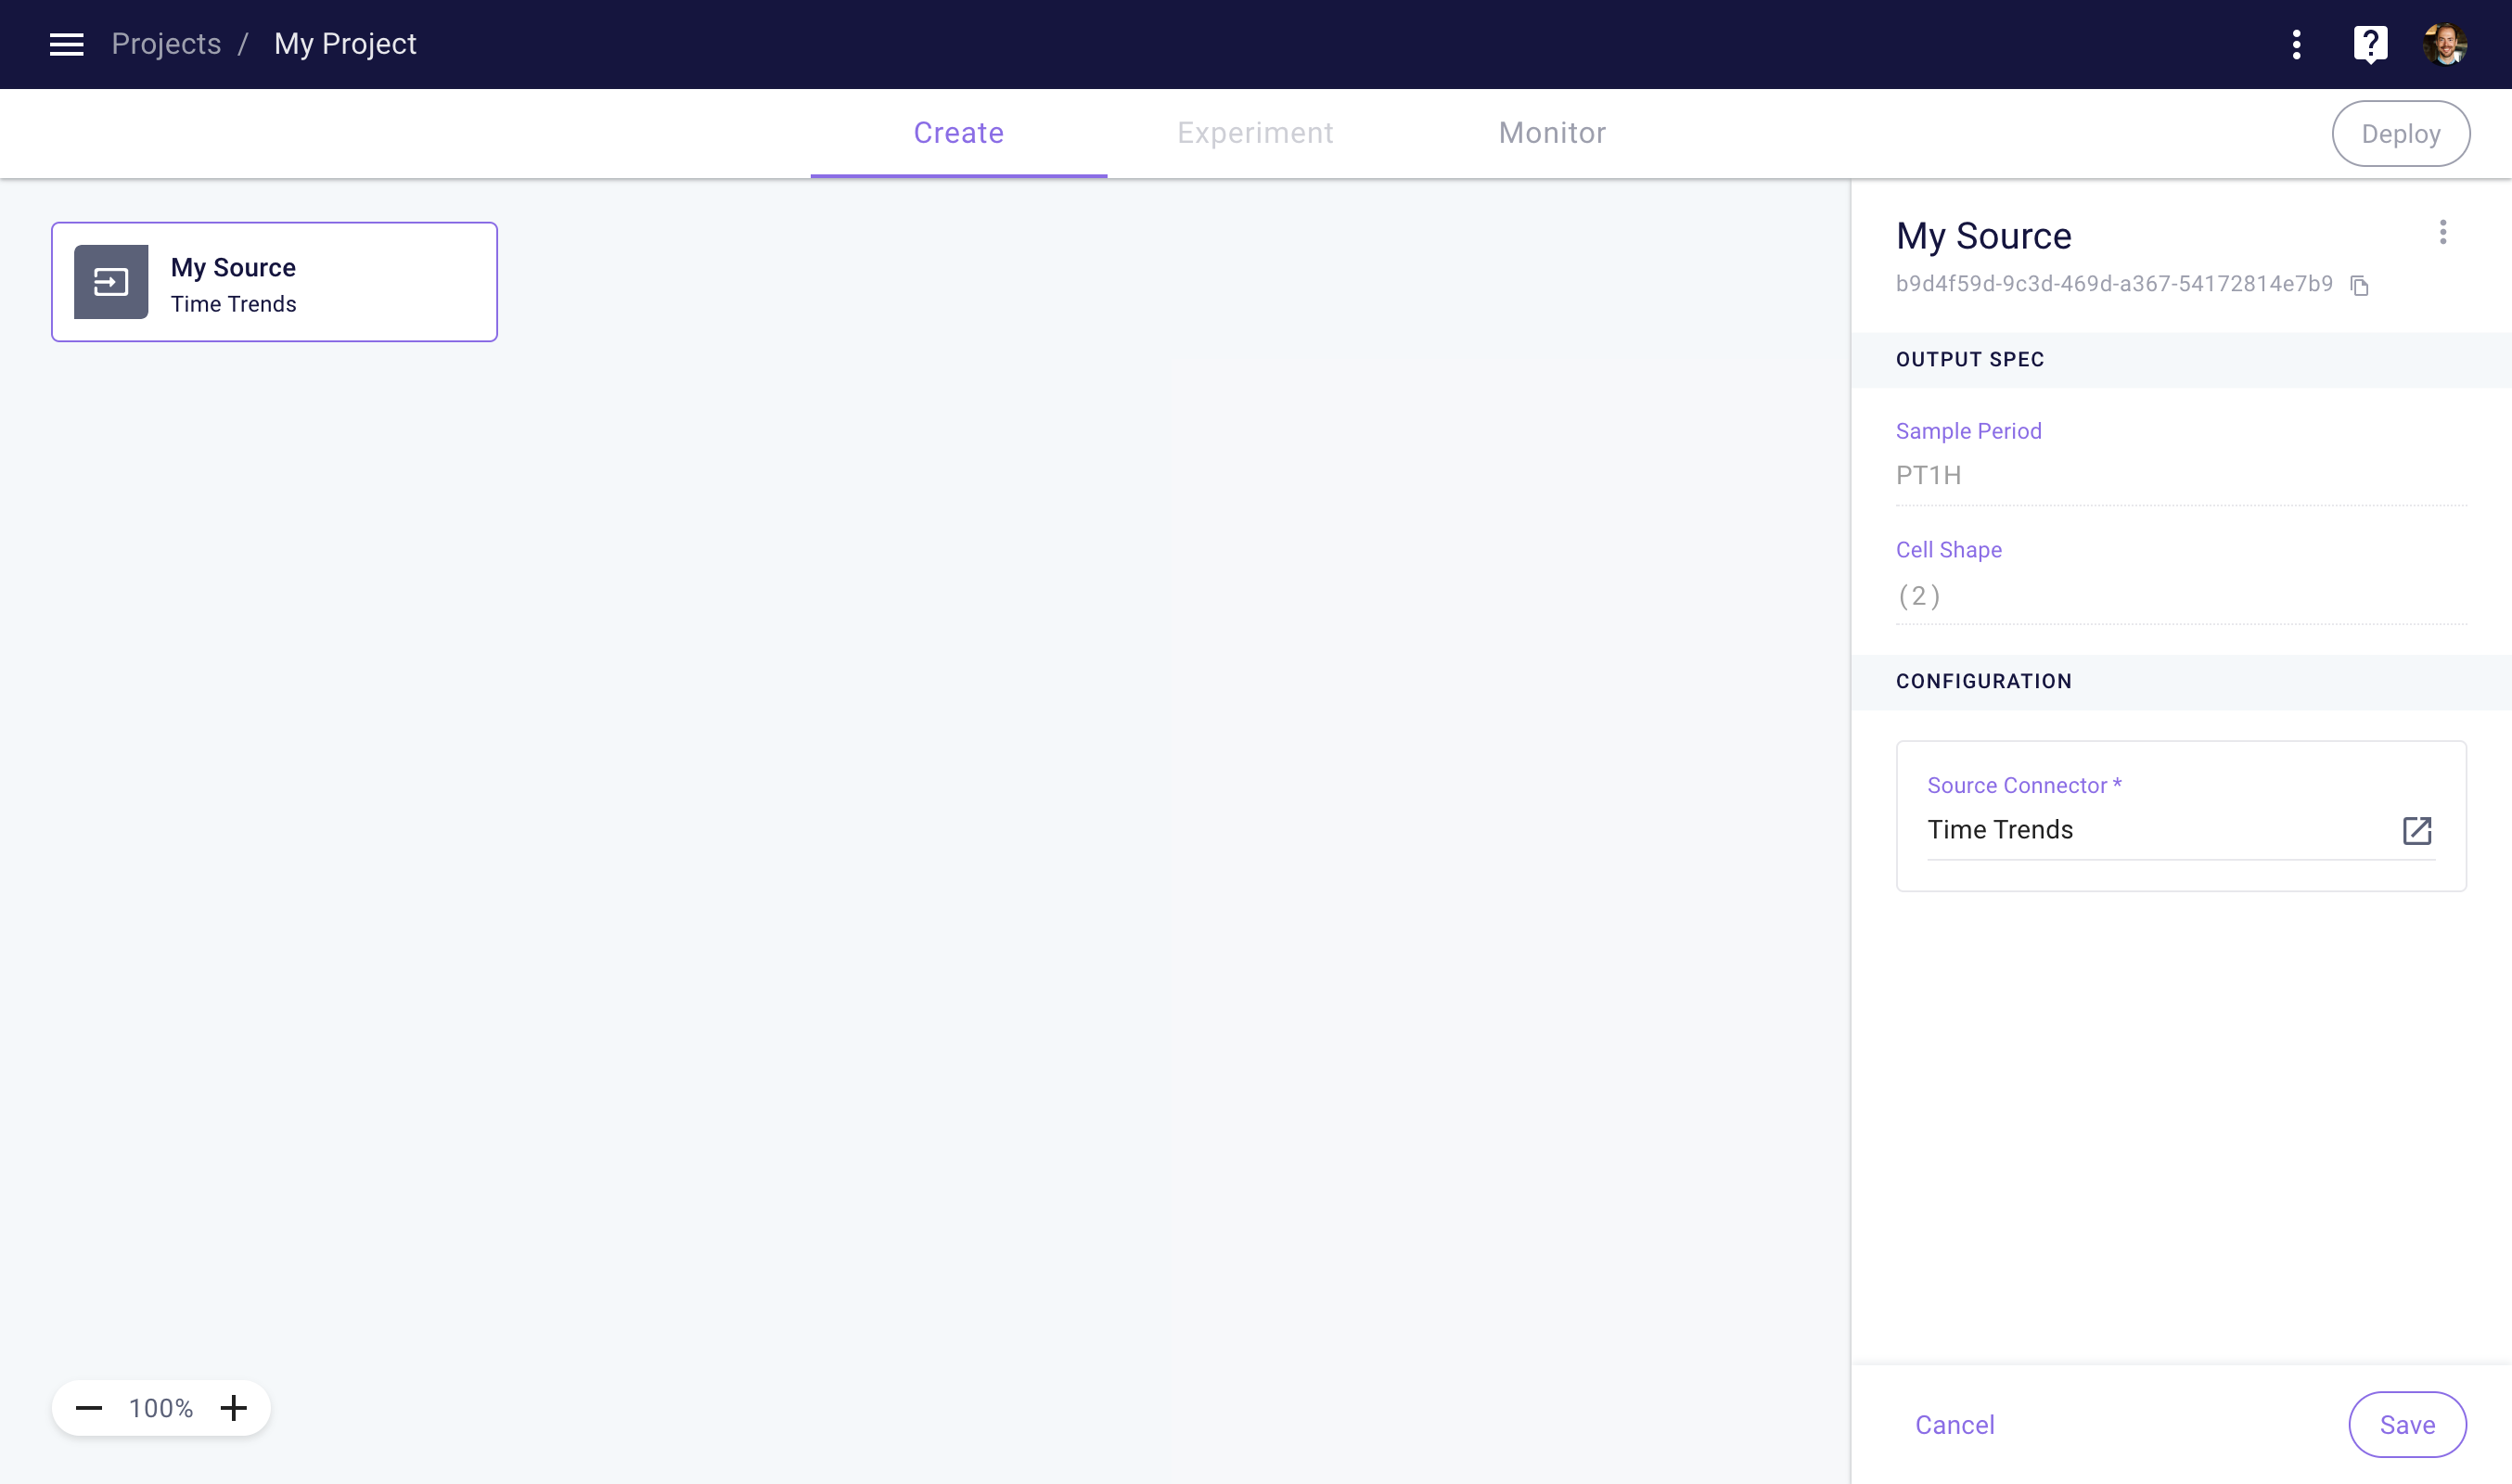
Configure a Source in your NoTS
Client Library
To create and configure a Source in the client library, you can use the following code. Note that in this example we are using the Time Trends connector, which contains time-based features. We will also create a downstream time series that contains the hour of day feature.
import myst
from myst.connectors.source_connectors import time_trends

myst.authenticate()

# Retrieve the project you want to use.
project = myst.Project.get(uuid="<uuid>")

# Create a new source.
source = project.create_source(
    title="My Source",
    connector=time_trends.TimeTrends(
        sample_period=myst.TimeDelta("PT1H"),
        time_zone="UTC",
        fields=[time_trends.Field.HOUR_OF_DAY, time_trends.Field.DAY_OF_WEEK],
    ),
)

# Create a time series containing the hour of day feature.
time_series = source.create_time_series(
    title="Hour of Day",
    sample_period=myst.TimeDelta("PT1H"),
    label_indexer=time_trends.Field.HOUR_OF_DAY,
)
Create an Operation
Operations allow you to apply an operation to one or more upstream Time Series, with the outputs flowing into one or more downstream Time Series. When initializing an Operation you will need to specify an Operation Connector, which contains the logic used in the Operation.
Once you've created a Project, you can create an Operation in your NoTS.
Web Application
From the Project Create space, click the plus sign in the bottom right corner and then click on Operation. This action will create a new Operation, which you can then configure.
To configure an Operation, select a connector from the Operation Connector Library. Once you've selected an Operation Connector, fill in the required parameters and then click save. Once you’ve saved an Operation, you can add one or more Time Series as Inputs in the configuration section of the right side-panel.
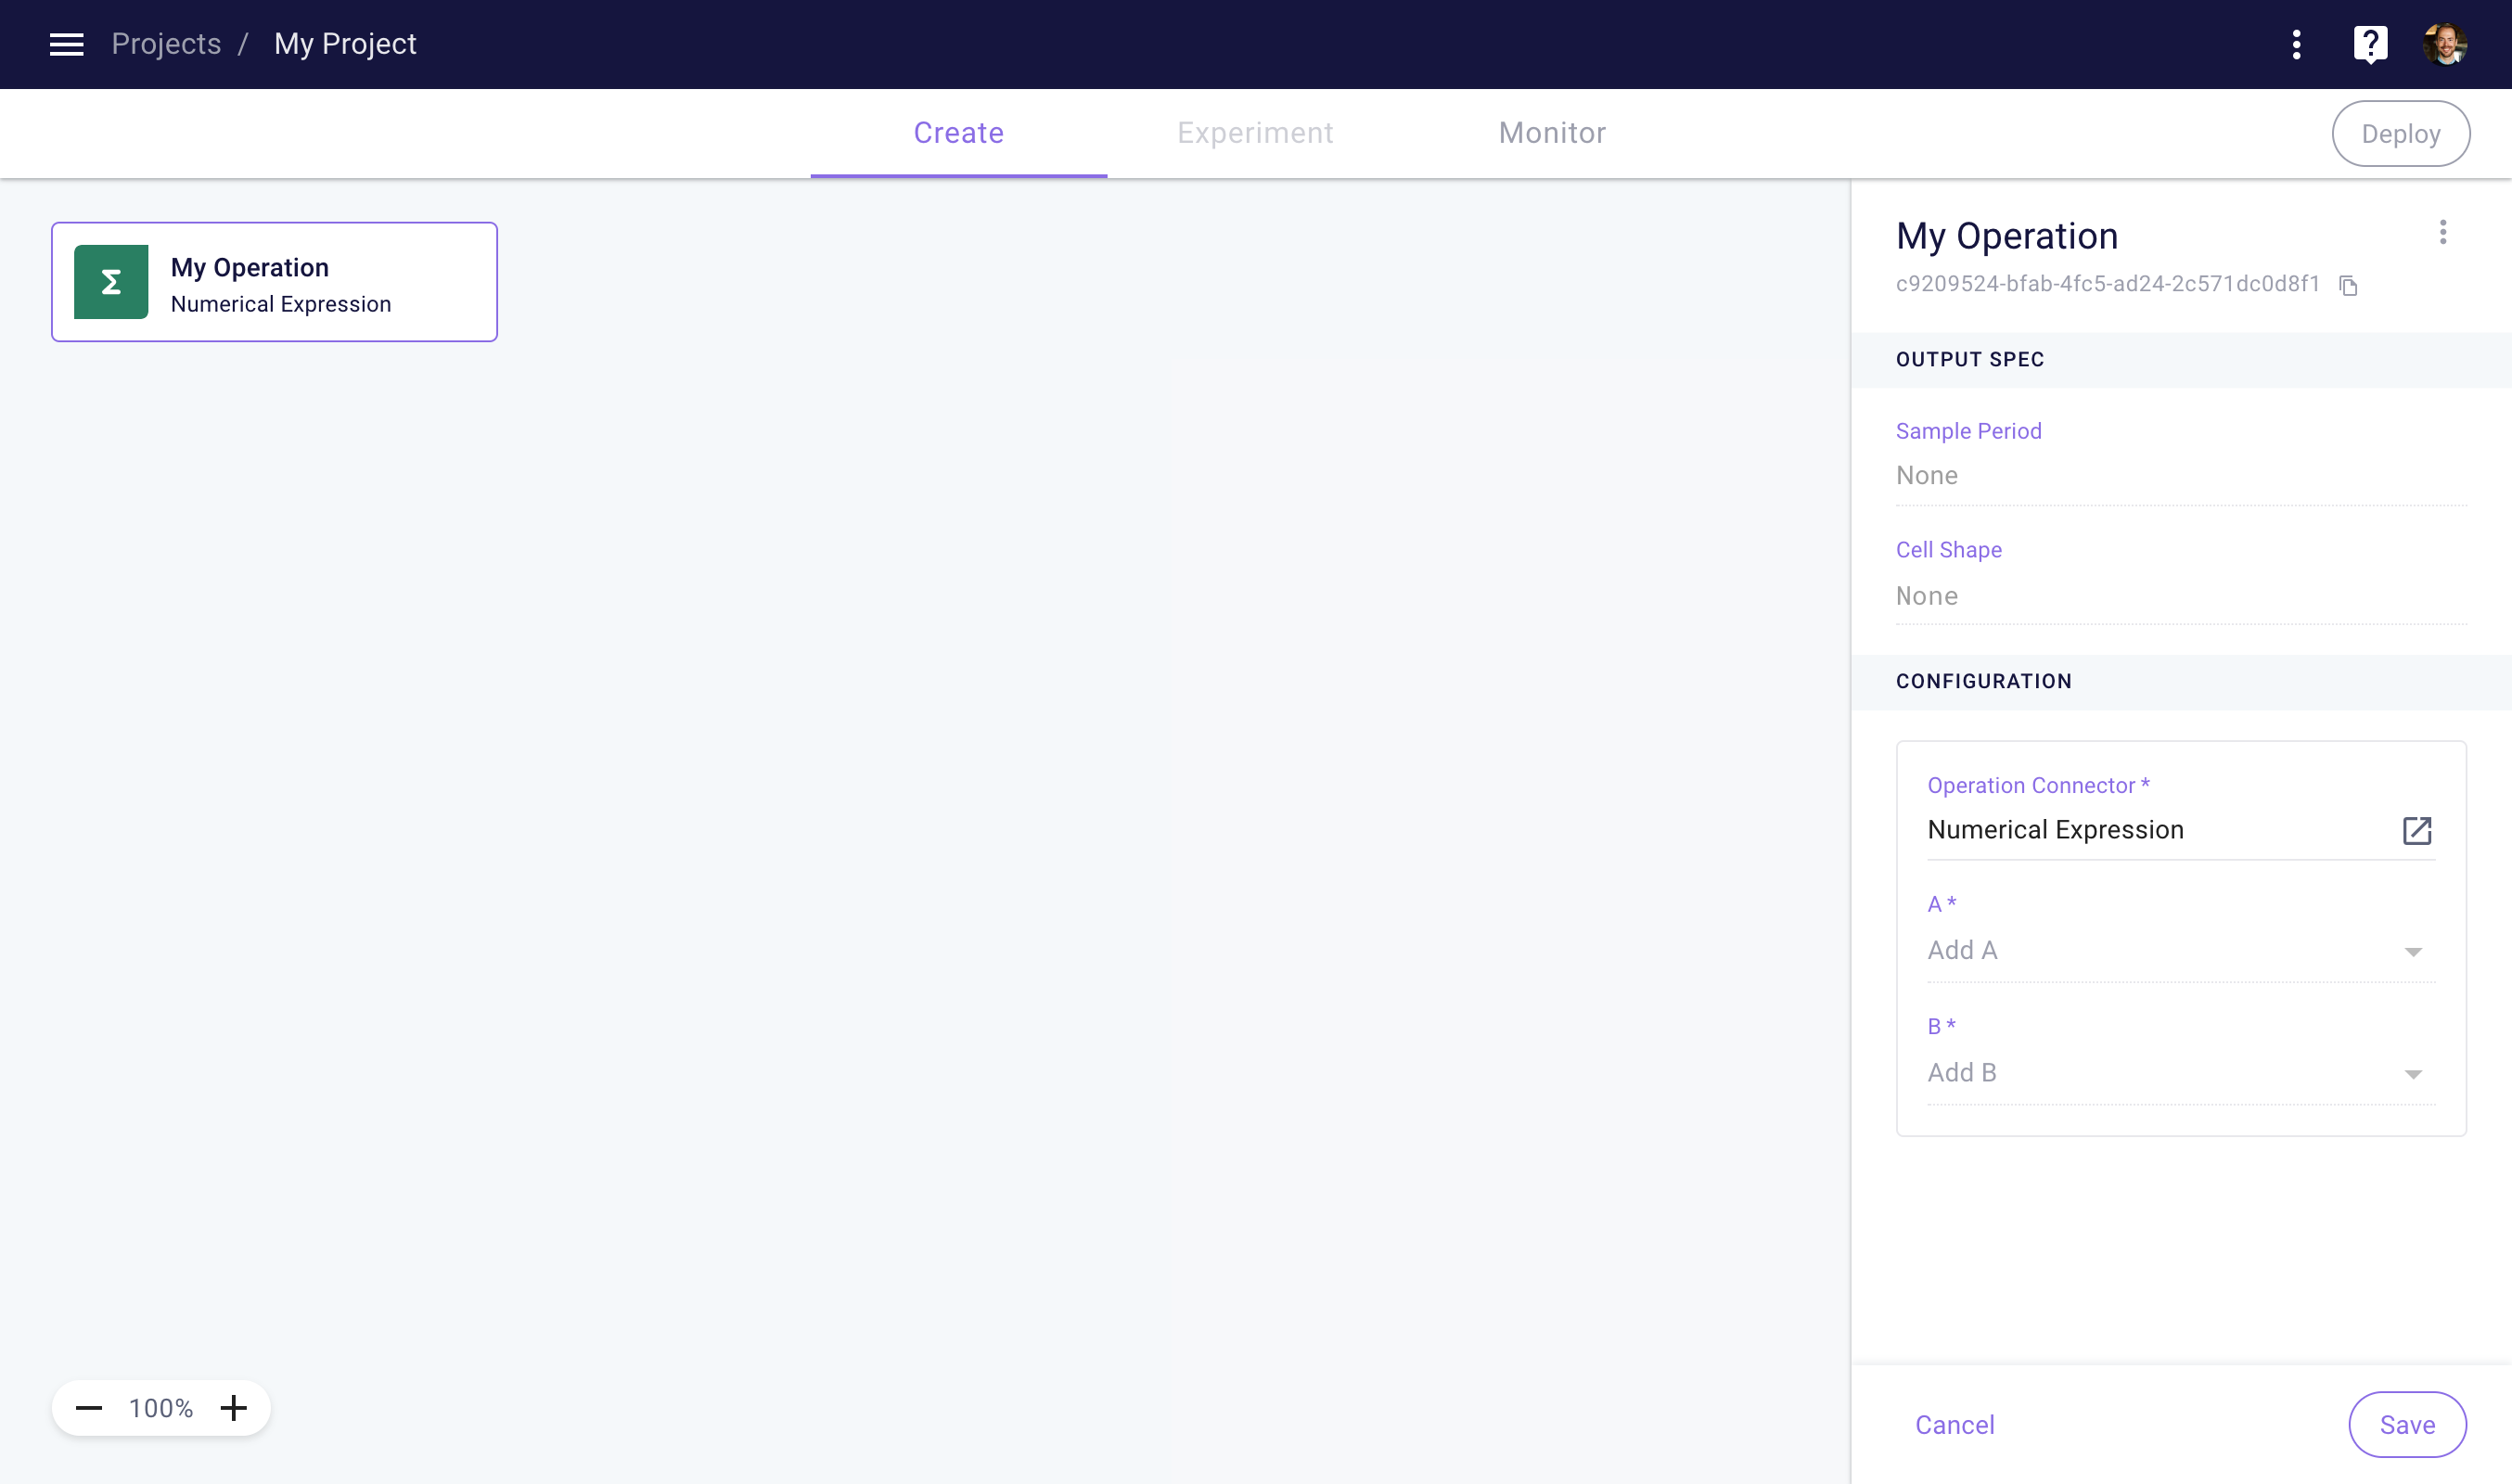
Configure an Operation in your NoTS
Client Library
To create and configure an Operation in the client library, you can use the following code. Note that in this example we are using the Numerical Expression connector, which allows you to apply a math operation to one or more Inputs. We will also create a downstream Time Series that contains the output of the Operation.
import myst
from myst.connectors.operation_connectors import numerical_expression

myst.authenticate()

# Retrieve the project you want to use.
project = myst.Project.get(uuid="<uuid>")

# Create a new operation.
operation = project.create_operation(
    title="My Operation",
    connector=numerical_expression.NumericalExpression(
        variable_names=["a", "b"],
        math_expression="a + b",
    ),
)

# Retrieve the upstream time series you want to use.
time_series_a = myst.TimeSeries.get(project=..., uuid="<uuid>")
time_series_b = myst.TimeSeries.get(project=..., uuid="<uuid>")

# Add the retrieved time series as inputs.
operation.create_input(time_series_a, group_name="a")
operation.create_input(time_series_b, group_name="b")

# Create a time series containing the output of the operation.
time_series = operation.create_time_series(
    title="Sum of Time Series A and B",
    sample_period=myst.TimeDelta("PT1H"),
)
Create a Model
Models allow you to predict a Time Series using one or more other Time Series. The predictions of a Model can flow into a downstream Time Series. When initializing a Model you will need to specify a Model Connector, which contains the logic used in the Model. Before you can run a model, it needs to be fit in historical data first. You can determine a schedule for when a Model should fit by creating a Model Fit Policy.
Once you've created a Project, you can create a Model in your NoTS.
Web Application
From the Project Create space, click the plus sign in the bottom right corner and then click on Model. This action will create a new Model, which you can then configure.
To configure a Model, select a connector from the Model Connector Library. Once you've selected a Model Connector, fill in the required parameters and then click save. Once you’ve saved a Model, you can add one or more Time Series as Inputs in the configuration section of the right side-panel. You can create a Model Fit Policy by clicking the Add Policy button.
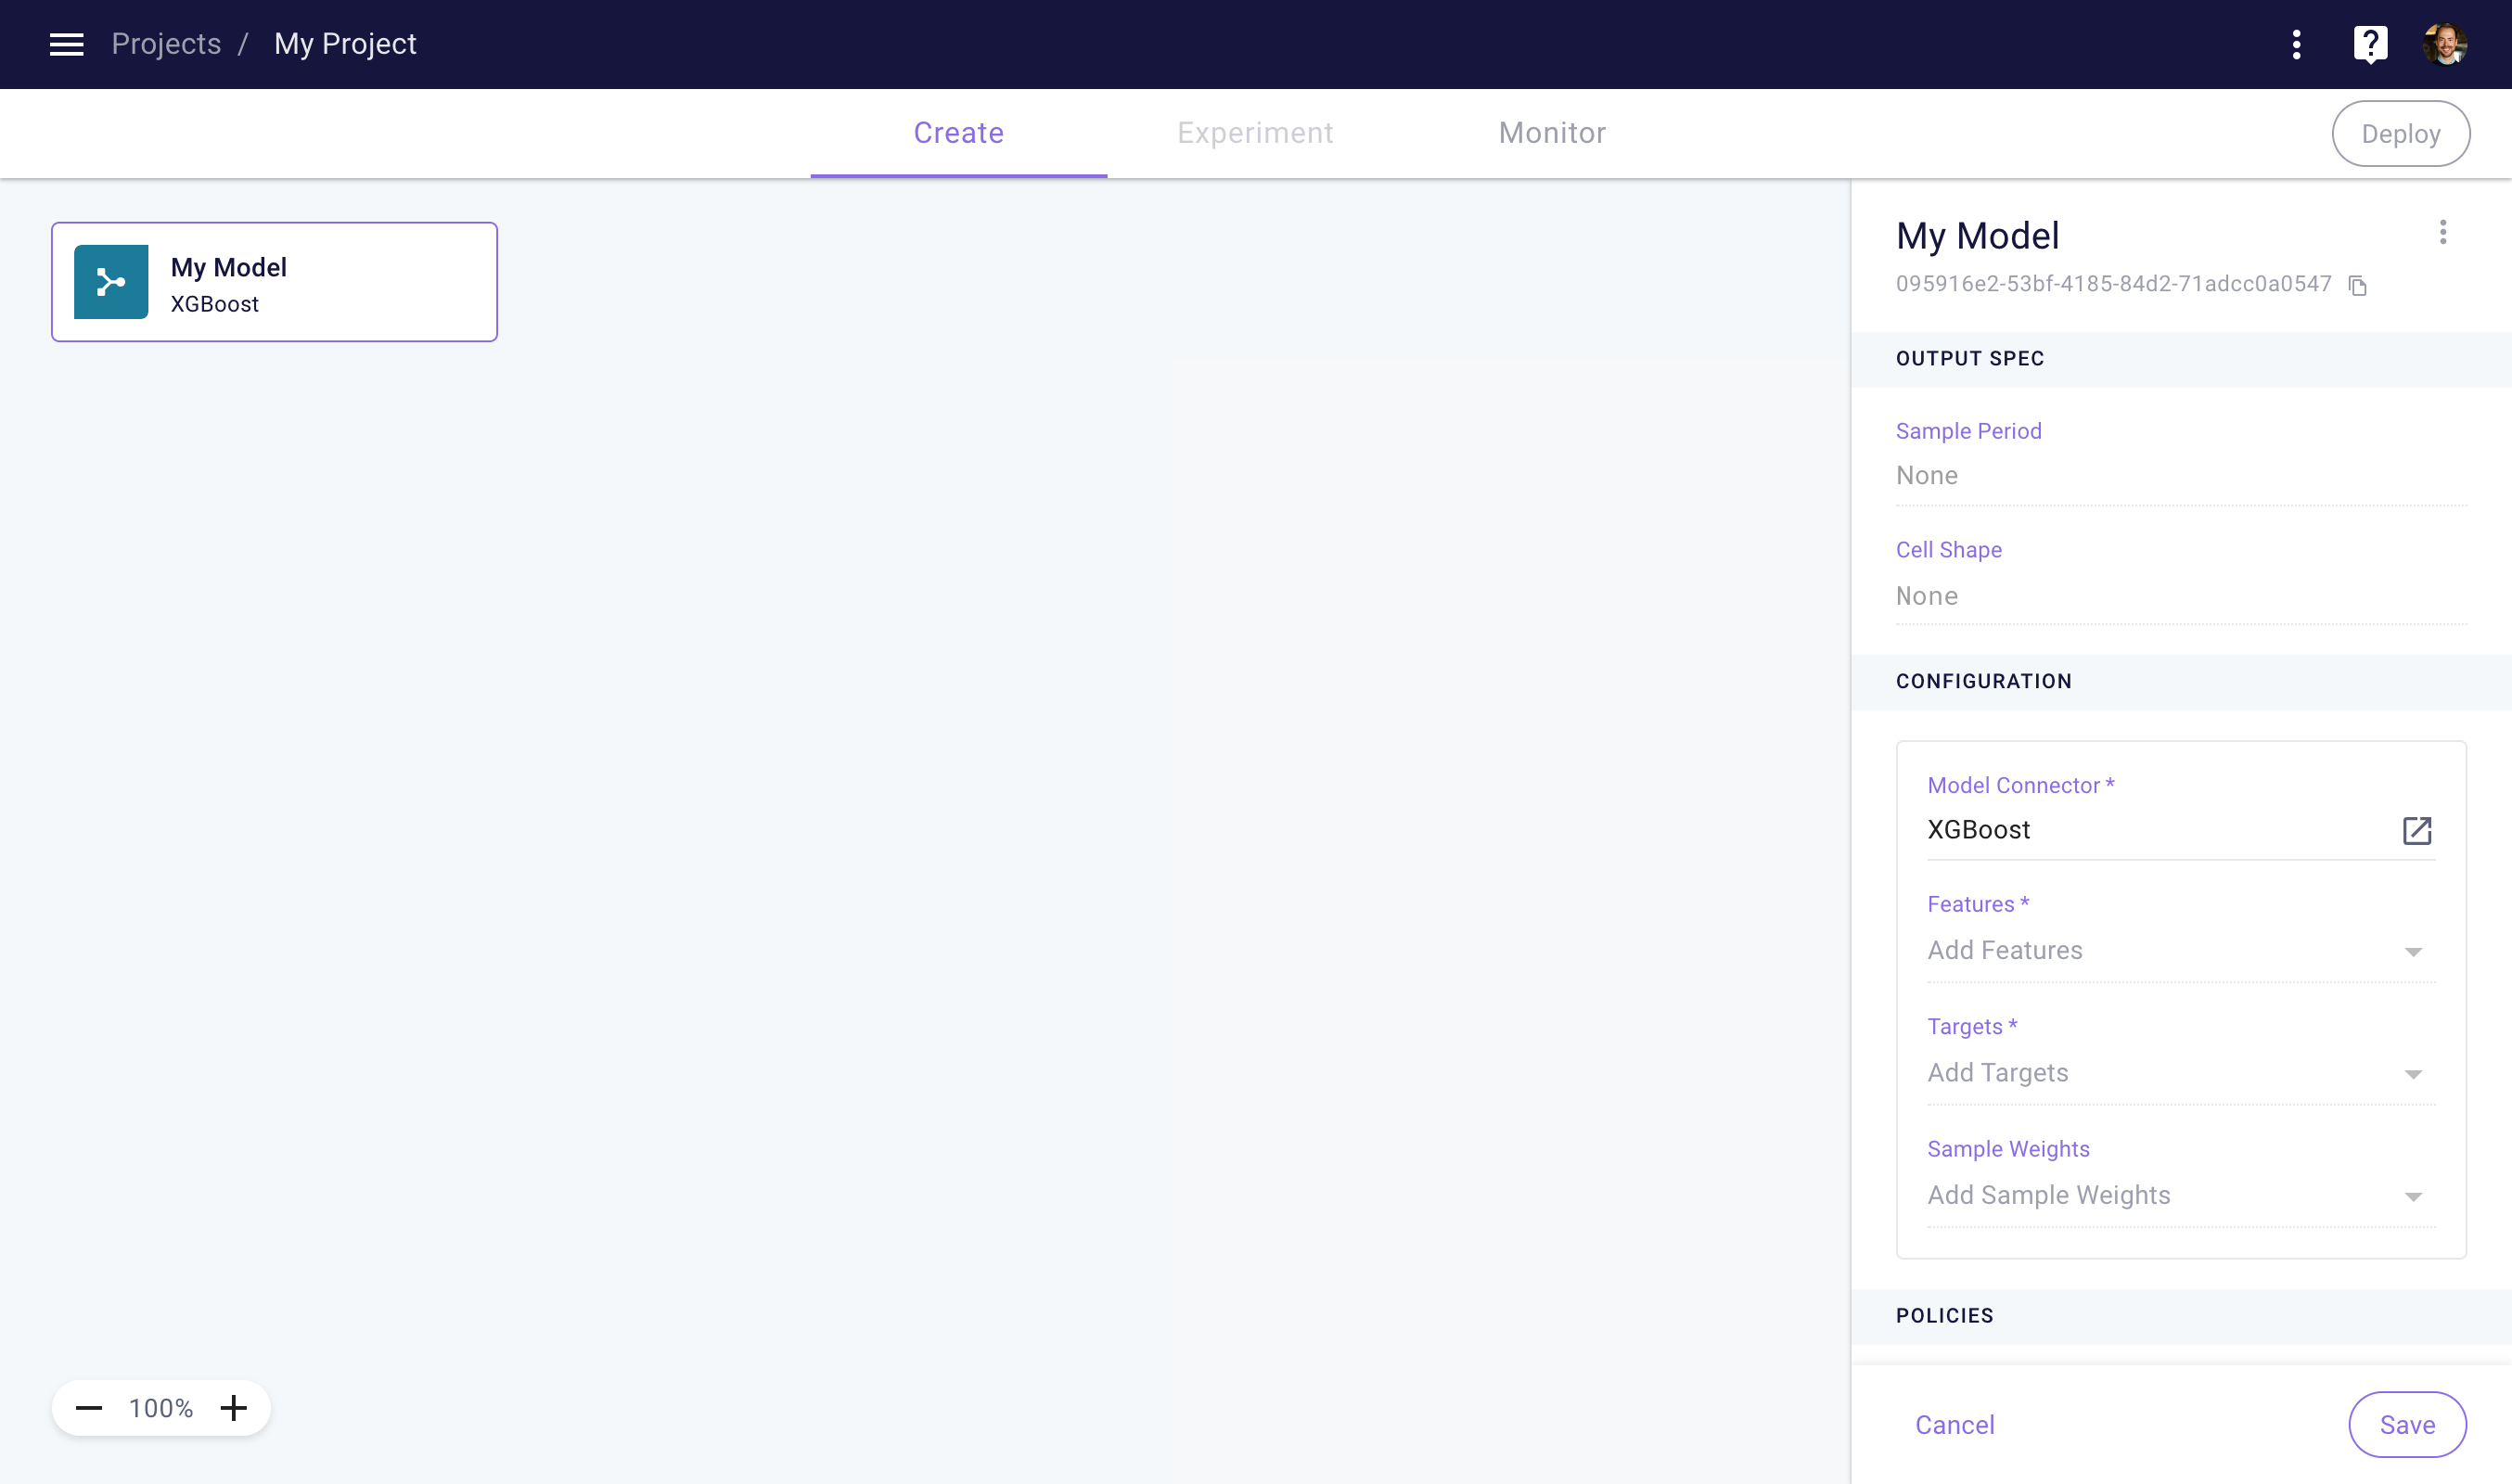
Configure a Model in your NoTS
Client Library
To create and configure a Model in the client library, you can use the following code. Note that in this example we are using the XGBoost connector, which uses the XGBoost package to create predictions. We will also create a downstream Time Series that contains the predictions of the Model.
import myst
from myst.connectors.model_connectors import xgboost

myst.authenticate()

# Retrieve the project you want to use.
project = myst.Project.get(uuid="<uuid>")

# Create a new model.
model = project.create_model(
    title="My Model",
    connector=xgboost.XGBoost(num_boost_round=100, max_depth=3, learning_rate=0.1),
)

# Retrieve the upstream time series you want to use.
feature_time_series = myst.TimeSeries.get(project_uuid=project.uuid, uuid="<uuid>")
target_time_series = myst.TimeSeries.get(project_uuid=project.uuid, uuid="<uuid>")

# Add the retrieved time series as inputs.
model.create_input(feature_time_series, group_name=xgboost.GroupName.FEATURES)
model.create_input(target_time_series, group_name=xgboost.GroupName.TARGETS)

# Add a fit policy to the model.
fit_policy = model.create_fit_policy(...)

# Create a time series containing the output of the operation.
time_series = model.create_time_series(
    title="Model Predictions",
    sample_period=myst.TimeDelta("PT1H"),
)
Updated over 3 years ago